Photoshop Lasso Tools
If you’ve ever felt frustrated trying to select complex shapes or objects in Photoshop, you’re not alone. Many beginners—and even intermediate users—struggle with selections. But here’s the secret: Photoshop Lasso Tools are your ultimate weapon for precision editing.
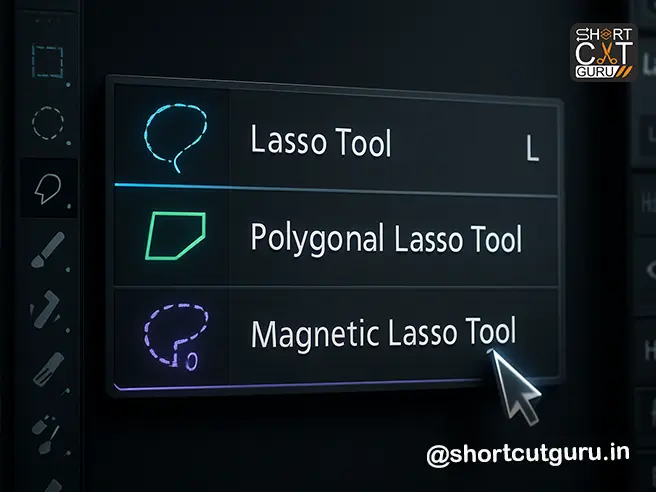
In this comprehensive, step-by-step guide, you’ll learn everything you need to know about the three powerful Lasso Tools: the Freehand Lasso, the Polygonal Lasso, and the Magnetic Lasso. Whether you’re cutting out hair, selecting geometric shapes, or tracing soft edges, we’ll show you exactly how to wield these tools like a seasoned Photoshop pro.
By the end of this 2000+ word guide, you’ll be able to:
✅ Confidently select any object regardless of edge complexity
✅ Use feathering and anti-aliasing to create seamless blends
✅ Combine selections using Add, Subtract, and Intersect modes
✅ Leverage shortcuts and hidden tricks to speed up your workflow
✅ Master the Magnetic Lasso’s Width, Contrast, and Frequency settings
✅ Integrate “Select and Mask” for Hollywood-level refinement
Table of Contents
Photoshop Pen Tool
Why Lasso Tools in Photoshop
Before we jump into the nitty-gritty, let’s talk about why these tools are essential.
Photoshop is built around selections. Whether you’re masking, compositing, retouching, or color grading, your ability to isolate parts of an image determines the quality of your final result. While tools like Quick Selection or Object Selection are great for beginners, they often fail with complex edges — think fur, hair, glass, foliage, or intricate product shapes.
That’s where the Lasso Tools come in.
They give you manual control, pixel-level precision, and adaptive intelligence (in the case of the Magnetic Lasso). Used correctly, they can outperform automated tools in tricky scenarios.
Section 1: The Freehand Photoshop Lasso Tools — Unleash Your Inner Artist
![Image Prompt: A hand using a graphics tablet to draw a freehand lasso selection around a coffee cup on a wooden table, with a soft feathered edge visible around the selection border.]
What Is the Freehand Photoshop Lasso Tools?
The Freehand Lasso Tool (shortcut: L) lets you draw freeform, hand-drawn selection borders around any part of your image. It’s perfect for organic shapes — like selecting a person’s shoulder, a cloud, or a brushstroke.
Step-by-Step: How to Use It
- Select the Photoshop Lasso Tools from the toolbar or press L.
- In the Options Bar, set your:
- Feather value (e.g., 1–5px for soft edges)
- Ensure Anti-alias is checked (smoothes jagged edges)
- Click and drag to draw your selection freely.
- To add straight lines while drawing:
- Hold Alt (Windows) or Option (Mac) and click to start a straight segment.
- Click again to end that segment — Photoshop draws a straight line between points.
- To erase your last segment, press Delete.
- To close the selection, release your mouse near the starting point — Photoshop auto-closes it.
- (Optional) Click Select and Mask to refine edges further.
💡 Pro Tip: Use Feather = 0px for sharp selections (e.g., product cutouts), and 2–10px for blending into backgrounds (e.g., portraits).

Section 2: The Polygonal Lasso Tool in Photoshop — Precision for Geometric Shapes
![Image Prompt: A technical diagram showing the Polygonal Lasso Tool creating straight-edged selections around a mechanical gear, with anchor points visible and Shift key held to constrain angles to 45 degrees.]
What Is the Polygonal Lasso Tool in Photoshop?
This tool is ideal for selecting objects with straight edges — buildings, boxes, UI elements, or any angular shape. You click to place anchor points, and Photoshop connects them with straight lines.
Step-by-Step: How to Use It
- Select the Polygonal Lasso Tool in photoshop (nested under the Lasso Tool — right-click to find it).
- Set Feather and Anti-alias in the Options Bar if needed.
- Click to place your first anchor point.
- Move your cursor and click again to create a straight segment.
- To constrain angles to multiples of 45°, hold Shift while clicking.
- To draw a freehand curve mid-selection, hold Alt/Option and drag — then release to return to straight lines.
- To delete your last point, press Delete.
- To close the selection:
- Hover over your starting point until a small circle appears → click.
- Or, double-click anywhere to auto-close with a straight line.
- Or, Ctrl+Click (Win) / Cmd+Click (Mac) to close manually.
- Click Select and Mask for advanced edge refinement.
🎯 Use Case: Perfect for architectural photos, product mockups, or selecting UI elements in app design.

Section 3: The Magnetic Lasso Tool — Photoshop’s Smart Selection Assistant
![Image Prompt: A split-screen image: Left side shows a high-contrast subject (a black cat on white background) being traced by the Magnetic Lasso with visible fastening points. Right side shows a low-contrast subject (a gray vase on beige background) with the tool struggling — illustrating the importance of contrast settings.]
What Is the Magnetic Lasso Tool?
This is Photoshop’s semi-automatic edge-snapping tool. It detects and “sticks” to edges as you move your cursor — perfect for subjects with defined borders against contrasting backgrounds.
⚠️ Note: Not available for 32-bit/channel images.
Ideal Use Cases
- Selecting a person against a solid background
- Cutting out products with clear outlines
- Isolating animals, vehicles, or objects with hard edges
Avoid using it on:
- Low-contrast edges (e.g., sky against clouds)
- Fuzzy or blurry borders
- Transparent or semi-transparent objects

Step-by-Step: How to Use the Magnetic Lasso Tool
- Select the Magnetic Lasso Tool (also nested under Lasso Tool).
- In the Options Bar, configure:
- Feather & Anti-alias (as needed)
- Selection Mode (New, Add, Subtract, Intersect)
- Fine-tune these critical settings:
➤ Width (Detection Sensitivity)
- What it does: Sets how far from your cursor Photoshop looks for edges.
- Default: 10px
- Pro Tip:
- High Width (20–40px) → Use for rough tracing on high-contrast images.
- Low Width (1–5px) → Use for precision on soft or detailed edges.
💡 Press Caps Lock to see the detection width as a circle around your cursor.
Use [ and ] to decrease/increase width by 1px on the fly.
➤ Contrast (Edge Sensitivity)
- Range: 1% – 100%
- High Contrast (70–100%): Only snaps to sharp, high-contrast edges.
- Low Contrast (1–30%): Detects subtle edges — useful for skin, fabric, or gradients.
➤ Frequency (Anchor Point Density)
- Range: 0 – 100
- High Frequency (50–100): Places anchor points frequently — great for complex curves.
- Low Frequency (0–30): Fewer points — better for slow, smooth edges.
🧠 Rule of Thumb:
High Contrast Image? → High Width + High Contrast + Medium Frequency
Soft Edge Image? → Low Width + Low Contrast + High Frequency
➤ Stylus Pressure (Tablet Users Only)
- If checked, pressing harder with your stylus reduces the edge detection width — giving you dynamic control.

Using the Tool: Practical Workflow
- Click to place your first fastening point.
- Move your cursor along the edge — Photoshop automatically places anchor points and snaps to edges.
- If it misses an edge, click manually to add an anchor point.
- To switch tools temporarily:
- Hold Alt/Option + Drag → Switches to Freehand Lasso
- Hold Alt/Option + Click → Switches to Polygonal Lasso
- To delete recent segments, press Delete repeatedly.
- To close the selection:
- Double-click → Closes with a magnetic segment
- Enter/Return → Same as double-click
- Alt/Option + Double-click → Closes with a straight line
- Drag over starting point → Manual close
✅ Always follow up with Select and Mask for refining hair, fur, or semi-transparent areas.
Section 4: Advanced Techniques & Pro Shortcuts
![Image Prompt: A keyboard with Photoshop shortcut keys highlighted — L for Lasso, Shift for 45°, Alt/Option for tool switching, Delete for undo, Caps Lock for width preview — floating above a Photoshop canvas with a selection in progress.]
1. Combine Selection Modes Like a Pro
In the Options Bar, you’ll find four selection modes:
- New Selection (Default)
- Add to Selection (+)
- Subtract from Selection (–)
- Intersect with Selection ( overlapping icon)
Example: Use Add to select multiple non-contiguous objects. Use Subtract to cut holes in your selection.
2. Feathering & Anti-Aliasing Explained
Feathering
- Softens the edge of your selection by blurring it over X pixels.
- Use 0–1px for sharp product cutouts.
- Use 5–20px for blending people into new backgrounds.
Anti-Aliasing
- Smooths jagged “stair-step” edges by blending pixels.
- Always keep this ON unless you need pixel-perfect hard edges (e.g., for web graphics or icons).
📌 Both settings are found in the Options Bar — set them BEFORE you start drawing.
3. The Power of “Select and Mask”
No selection is perfect straight out of the Lasso Tool. That’s why Adobe gave us Select and Mask.
After making any lasso selection:
- Click Select and Mask in the Options Bar.
- Use:
- Edge Detection → Radius (great for hair/fur)
- Global Refinements → Smooth, Feather, Contrast, Shift Edge
- Output Settings → Choose “New Layer with Layer Mask”
🎬 Bonus: Use the Refine Edge Brush inside Select and Mask to manually fix tricky areas like flyaway hairs or translucent edges.
4. Keyboard Shortcuts Cheat Sheet
| Switch to Lasso Tool | L | L |
| Add to Selection | Shift + Drag | Shift + Drag |
| Subtract from Selection | Alt + Drag | Option + Drag |
| Intersect Selection | Shift + Alt + Drag | Shift + Option + Drag |
| Draw Straight Line (Lasso) | Alt + Click | Option + Click |
| Constrain to 45° (Polygonal) | Shift + Click | Shift + Click |
| Erase Last Segment | Delete | Delete |
| Increase Width (Magnetic) | ] | ] |
| Decrease Width (Magnetic) | [ | [ |
| Toggle Width Preview | Caps Lock | Caps Lock |
| Close Selection | Enter / Double-click | Return / Double-click |
Print this. Tape it to your monitor. Thank us later.
Section 5: Real-World Examples & When to Use Which Tool
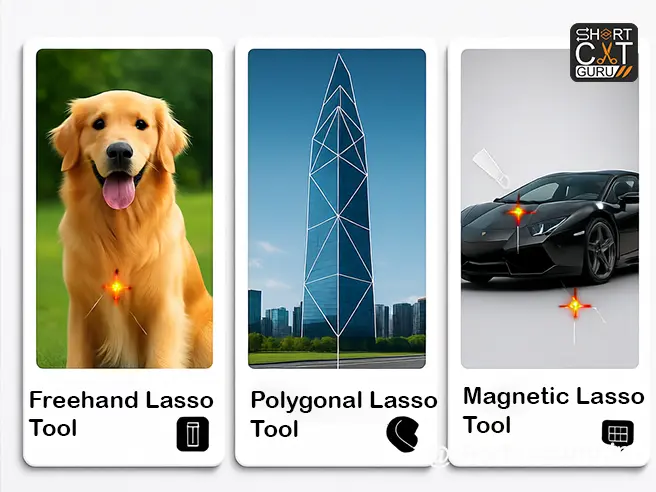
![Image Prompt: A triptych showing three real-world scenarios: 1) Freehand Lasso selecting a fluffy dog, 2) Polygonal Lasso selecting a building with sharp angles, 3) Magnetic Lasso selecting a black car against white background — each with tool icon overlay.]
Scenario 1: Selecting a Person with Wavy Hair
✅ Best Tool: Magnetic Lasso → then Select and Mask with Edge Detection
Set Width=15px, Contrast=60%, Frequency=70
Refine hair using Refine Edge Brush
Scenario 2: Cutting Out a Modern Chair (Geometric Design)
✅ Best Tool: Polygonal Lasso
Use Shift to constrain angles. Add feather=1px for slight softness.
Scenario 3: Selecting Smoke or Clouds
✅ Best Tool: Freehand Lasso with Feather=10–20px
Anti-alias ON. Follow organic shapes loosely — precision isn’t needed here.
Scenario 4: Product Photography (White Background)
✅ Best Tool: Magnetic Lasso Tool
High Contrast (90%), Width=20px, Frequency=50
Close with Enter. Output to Layer Mask.

Section 6: Common Mistakes & How to Avoid Them
❌ Mistake 1: Ignoring Feather and Anti-Alias Settings
Many users draw perfect selections… then wonder why the edges look jagged or harsh. Always check these settings BEFORE you start.
❌ Mistake 2: Using Magnetic Lasso on Low-Contrast Images
It’ll snap to the wrong edges or fail entirely. Switch to Freehand or use Select Subject + Refine instead.
❌ Mistake 3: Not Using Select and Mask
Lasso tools give you a starting point — not a finished product. Always refine edges for professional results.
❌ Mistake 4: Forgetting Keyboard Shortcuts
You’re wasting time clicking icons. Learn the shortcuts — they’ll cut your editing time in half.
Section 7: Practice Exercises to Build Muscle Memory
Want to master these tools? Try these drills:
🎯 Exercise 1: Freehand Challenge
- Open a photo of a tree or bush.
- Use Freehand Lasso to select 3 branches.
- Feather = 3px, Anti-alias ON.
- Output to new layer. Does it blend naturally?
🎯 Exercise 2: Polygonal Precision
- Find an image of a city skyline or furniture.
- Use Polygonal Lasso to select 5 angular objects.
- Use Shift to constrain angles.
- Try closing with double-click vs. Alt+click.
🎯 Exercise 3: Magnetic Mastery
- Choose a high-contrast object (e.g., black shoe on white).
- Set Width=25, Contrast=80, Frequency=60.
- Trace slowly. Manually add points where it fails.
- Refine with Select and Mask → Output to Layer Mask.

Final Thoughts: Polygonal Lasso Tool Are Your Secret Weapon
While AI-powered tools like “Select Subject” and “Object Selection” are getting smarter, nothing beats manual control when you need pixel-perfect results. The Lasso Tools — Freehand, Polygonal, and Magnetic — are timeless, powerful, and essential for any serious Photoshop user.
Don’t just use them — master them. Combine them. Refine them. Make them part of your daily workflow.
And remember: every expert was once a beginner who refused to give up.
FAQ: Photoshop Lasso Tools
Q: What’s the difference between Lasso and Magnetic Lasso Tool?
Lasso = Freehand drawing.
Magnetic Lasso = Automatically snaps to edges as you move.
Q: Why isn’t Magnetic Lasso Tool working?
Check:
- Is your image 32-bit? (Not supported)
- Is contrast too low? Increase Contrast setting.
- Is Width too small? Try 20–40px.
Q: How do I make softer edges?
Use Feather in the Options Bar (1–10px) + Select and Mask → Global Refinements → Feather.
Q: Can I use Polygonal Lasso Tool on iPad?
Yes! Photoshop for iPad supports all three Lasso Tools with touch and Apple Pencil optimization.
Conclusion: Your Path to Photoshop Mastery Starts Here
You now hold in your hands the complete guide to Photoshop’s Lasso Tools — the unsung heroes of precision selection. Whether you’re a photographer, designer, retoucher, or digital artist, mastering these tools will elevate your work from “good” to “gallery-ready.”
🚀 Action Step: Open Photoshop right now. Pick an image. Try one tool. Then try another. Refine with Select and Mask. Save your result. Repeat tomorrow.
The difference between amateurs and pros isn’t talent — it’s practice, precision, and persistence.
Now go make something amazing.


