Filmora by Wondershare is one of the best video editing tools that lets creators produce great quality videos without much time. Mastering Filmora keyboard shortcuts helps enhance productivity, navigating the interface and executing commands for faster video editing. Below are all the essential Filmora. shortcuts for Windows.
Table of Contents
Why Filmora keyboard shortcuts Are Important
Keyboard shortcuts speed up the editing process, minimize mouse clicks to navigate, and make work more precise in the workflow. For trimming, splitting, or applying effects, shortcuts save time and avoid interrupting the creative flow.
Essential Filmora keyboard shortcuts on Windows
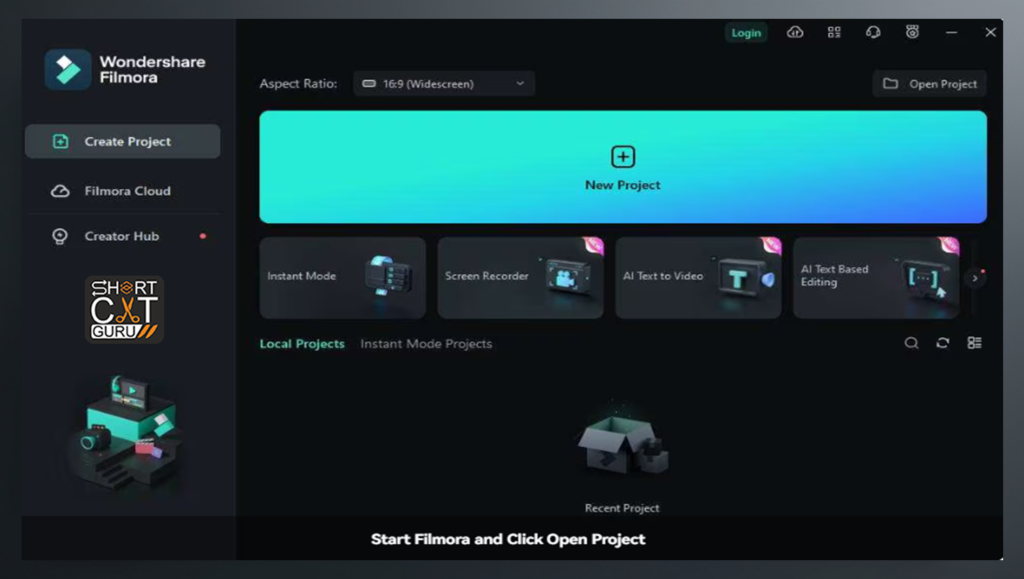
Project Management Filmora keyboard shortcuts
These shortcuts assist in managing your projects with ease.
| Filmora Keyboard Shortcuts Action | Filmora Keyboard Shortcuts |
| New Project | Ctrl + N |
| Open Project | Ctrl + O |
| Save Project | Ctrl + S |
| Save Project As | Ctrl + Shift + S |
| Export | Ctrl + E |
Basic Editing Filmora keyboard shortcuts
Perform fundamental editing tasks with these commands.
| Filmora Keyboard Shortcuts Action | Filmora Keyboard Shortcuts |
| Undo | Ctrl + Z |
| Redo | Ctrl + Y |
| Cut | Ctrl + X |
| Copy | Ctrl + C |
| Paste | Ctrl + V |
| Delete | Delete |
| Ripple Delete | Ctrl + Delete |
| Split | Ctrl + B |
Timeline Navigation Shortcuts
Navigate the timeline efficiently for better control over your video editing.
| Filmora Keyboard Shortcuts Action | Filmora Keyboard Shortcuts |
| Play/Pause | Space |
| Stop | Shift + Space |
| Go to Previous Frame | Left Arrow |
| Go to Next Frame | Right Arrow |
| Zoom In on Timeline | Ctrl + + |
| Zoom Out on Timeline | Ctrl + – |
| Go to Start of Timeline | Home |
| Go to End of Timeline | End |
Advanced Editing Shortcuts
For more sophisticated editing needs, use these shortcuts.
| Filmora Keyboard Shortcuts Action | Filmora Keyboard Shortcuts |
| Apply Transition | Ctrl + T |
| Add to Timeline at Playhead | Ctrl + Shift + D |
| Detach Audio | Ctrl + Alt + D |
| Trim to Playhead | Ctrl + T |
| Match Frame | Ctrl + F |
| Add Marker | Ctrl + M |
| Delete Marker | Shift + M |
Preview and Effects Shortcuts
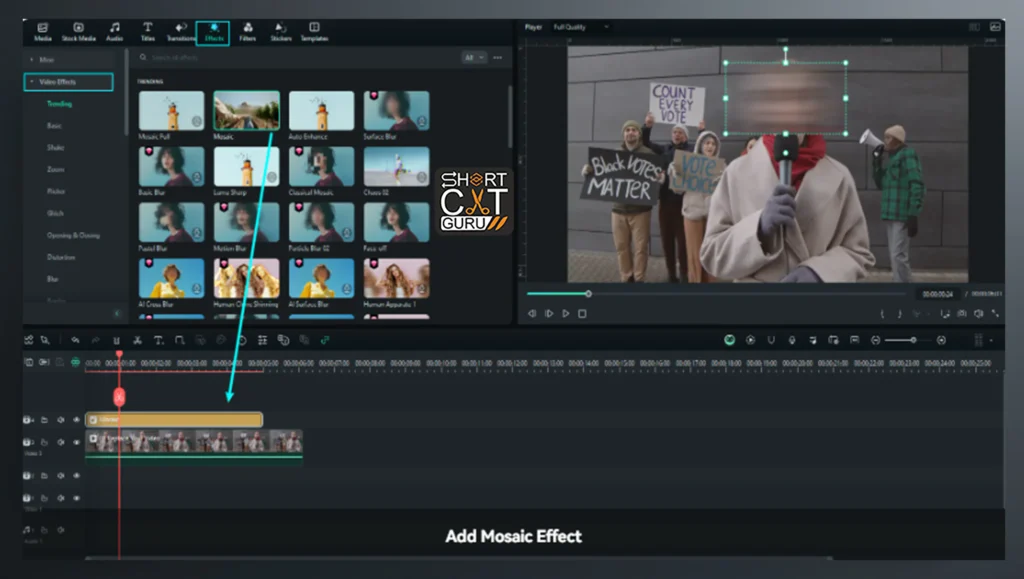
Enhance your previewing experience and streamline effect applications.
| Filmora Keyboard Shortcuts Action | Filmora Keyboard Shortcuts |
| Toggle Full Screen | F11 |
| Snapshot | Ctrl + Alt + S |
| Add Video Effect | Ctrl + Shift + E |
| Open Effect Panel | Ctrl + Shift + P |
Tips for Memorizing Filmora Keyboard Shortcuts
- Start Small: Focus on a few essential shortcuts that align with your most-used features.
- Use Cheat Sheets: Keep a printed list of shortcuts nearby for quick reference.
- Practice Frequently: Incorporate shortcuts into your workflow regularly for muscle memory.
- Customize Shortcuts: Filmora allows users to personalize shortcuts to suit individual preferences.
Customizing Keyboard Shortcuts in Filmora
Filmora offers users the flexibility to customize shortcuts to align with their unique workflow. Here’s how you can modify shortcuts:
- Access Shortcut Settings
Navigate to File > Keyboard Shortcuts in the Filmora menu bar. - Search for a Command
Use the search bar to quickly find the action or command you want to customize. - Set a New Shortcut
Click the action, press the new key combination you wish to assign, and confirm. - Reset to Default
If you want to revert all changes, click the Reset to Default button.
Customizing shortcuts ensures an even more personalized and efficient editing process.
Common Filmora Keyboard Shortcuts Errors and Troubleshooting
While using shortcuts in Filmora, you might encounter some challenges. Below are common issues and solutions:
- Shortcut Conflicts
Problem: Two actions are assigned the same shortcut.
Solution: Open the shortcut settings and reassign one of the actions to a different key combination. - Non-Responsive Shortcuts
Problem: A shortcut does not trigger the expected action.
Solution: Ensure your keyboard functions properly and no background applications intercept the key commands. - Language or Region-Specific Keyboards
Problem: Shortcuts behave differently on non-standard keyboards.
Solution: Adjust keyboard input settings in Windows or switch to the Standard English (US) layout for consistency.
Hidden Gems: Lesser-Known Filmora Keyboard Shortcuts
Here are some lesser-known but highly useful shortcuts:
| Filmora Keyboard Shortcuts Action | Filmora Keyboard Shortcuts |
| Toggle Audio Waveform | Alt + W |
| Lock/Unlock Selected Track | Ctrl + L |
| Select All Clips | Ctrl + A |
| Open Color Grading Panel | Ctrl + Shift + G |
| Mute/Unmute Audio | Ctrl + Shift + M |
| Adjust Playback Speed | Ctrl + R |
Using these hidden gems can further enhance your editing speed and precision.
Best Practices for Efficient Editing in Filmora
To get the most out of Filmora keyboard shortcuts, consider the following best practices:
1. Plan Your Workflow:
Before you begin your project, determine which tasks you do repeatedly and learn shortcuts for those actions first.
2. Combine Mouse and Keyboard:
Shortcuts are effective, but some tasks such as timeline adjustments require precision that can only be done with the mouse. Use both tools in tandem for the best results.
3. Leverage Filmora Keyboard Shortcuts Overlays:
Some third-party applications will show you an overlay of shortcuts on your screen as you edit, helping you learn.
4. Use Presets:
Save and customize preset effects or transitions to streamline repetitive actions.
Advanced Editing Techniques with Filmora Shortcuts
Mastering keyboard shortcuts not only increases productivity but also enables you to dive deeper into advanced editing techniques in Filmora. Here are some strategies to maximize your creative output using shortcuts.
1. Precision Audio Editing Filmora Keyboard Shortcuts
Audio editing is critical for creating immersive videos. Use these shortcuts for fine-tuning your sound design:
- Detach Audio (Ctrl + Alt + D): Quickly separate audio from a video clip for independent manipulation.
- Audio Keyframing: Although there isn’t a direct shortcut, combining Ctrl + Left Arrow or Ctrl + Right Arrow with mouse clicks on the timeline can speed up the process.
- Mute Tracks (Ctrl + Shift + M): Turn off audio temporarily to concentrate on video edits.
Pro Tip: Ripple delete (Ctrl + Delete) audio after trimming to keep the timeline intact.
2. Layer Management and Effects Filmora Keyboard Shortcuts
Layer management is very crucial for complex projects with many video and audio tracks.
- Lock/Unlock Tracks (Ctrl + L): Lock some layers to avoid accidental changes when making complex adjustments.
- Turn Video ON/OFF (Alt + V): Hide a layer to prevent distraction from other things.
- Apply Effects in Just One Click (Ctrl + Shift + E): Quick access to the effects panel while dragging effects to the timeline for the application.
3. Dynamic Video Transitions Filmora Keyboard Shortcuts
Video transitions either make or break a video’s visual flow. With Filmora shortcuts, applying and managing transitions are so smooth.
- Apply Default Transition (Ctrl + T): Quickly insert a transition at a playhead using one simple command.
- Adjust Transition Duration: Hover over the transition edge and use Ctrl + Left Arrow or Ctrl + Right Arrow to fine-tune the length.
Creative Tip: Mix in default transitions with custom ones to keep both speed and originality in your projects.
Exporting Workflow Optimization Using Shortcuts
Exporting your project is the last step in a streamlined editing workflow. Filmora shortcuts make this final step as easy for you as it is.
- Export Video (Ctrl + E): Get the export panel quickly.
- Select Export Presets: Use arrow keys to navigate preset options and then hit Enter to confirm
- Name and Save: Tab through the fields for file name, location, and settings to save time in setting up.
Filmora Keyboard Shortcuts Cheat Sheet
For easy reference, we’ve consolidated the most essential Filmora shortcuts in one place. Save or print this cheat sheet for quick access:

| Filmora Keyboard Shortcuts Category | Filmora Keyboard Shortcuts Action | Filmora Keyboard Shortcuts |
| Project Management | Save Project | Ctrl + S |
| Editing | Split Clip | Ctrl + B |
| Audio | Mute/Unmute | Ctrl + Shift + M |
| Timeline Navigation | Zoom In/Out | Ctrl + + / Ctrl + - |
| Export | Open Export Panel | Ctrl + E |
Additional Tips to Master Filmora Keyboard Shortcuts
To take shortcuts fully, here are some of the more advanced tips and best practices for various editing conditions:
1. Creating a Customized Filmora keyboard shortcuts Layout
Although Filmora’s inbuilt shortcuts are quite efficient by themselves, it’s always going to help your productivity get customized according to your personal flow. Here’s how to plan a layout:
- Task-based Organization: Group shortcuts by task types, such as trim, transitions, or effects.
- Most Used Actions First: Use shortcut keys for the most used actions.
- Test and Refine: Test your layout from time to time and refine it further.
Example:
- Use the function keys F1–F12 for transitions and effects.
- Use the adjacent keys like Q, W, E for navigation-based actions.
2. Use Filmora’s Timeline Features with Shortcuts
The core of video editing in Filmora is the timeline. Mastering shortcuts in this section will save you a lot of time in your editing process.
- Zoom in and out of Large Projects: Ctrl + Scroll Wheel helps you zoom in and out, so you don’t lose control of your timelines.
- Snap Clips to Playhead: Snapping (S) helps clips snap to markers or the playhead.
- Shortcut Combo for Complex Edits:
- Fit to playhead (Ctrl + T).
- Ripple delete space ( Ctrl + Delete ).
- Preview the output (Space)
3. Finding Filmora keyboard shortcuts for Speed
Speed manipulation is sometimes very important and is either a slow motion or a speedup situation in the production. Filmora provides shortcuts easily:
- Open Speed panel (Ctrl + R), and the required tool to be used to control speed will automatically open.
- Preset speed changes with arrow key to navigate among available speed values.
- Match Speed to Clip: Match several clips to the same speed by altering one and duplicating its settings (Ctrl + D).
4. Filmora keyboard shortcuts Tricks for a More Effective Effects Workflow
Effects are what make a video visually attractive. Leverage shortcuts to apply effects seamlessly:
- Effect Duplication: Copy an applied effect (Ctrl + C), select another clip, and paste it (Ctrl + V).
- Instant Effect Removal: Select a clip and press Delete to remove all effects applied instantly.
- Effect Layering: Combine effects with transitions and overlays for dynamic compositions. Lock other tracks (Ctrl + L) to focus solely on the current layer.
4. Maximizing Filmora’s Capabilities Beyond Shortcuts
While keyboard shortcuts are important, combining them with Filmora’s advanced features can take your editing to the next level:
Utilize Templates and Presets
- A filmora library contains presets of templates of titles, transitions, and effects. Accessing presets is done by pressing Ctrl + Shift + P and designing streamlined.
Integrate Plugins
- Plugins of Filmora enhance the capabilities. Advanced effects, LUTs, and AI tools can all be added through the integration with plugins. Users can tailor the shortcuts to work directly on these plugins and enhance the workflow.
Apply Split-Screen Editing
- Dedicated split-screen tool to create dynamic split-screen layouts. Access it instantly through the effects panel (Ctrl + Shift + E) and save your custom layouts for easy reuse.
Practice Makes Perfect
The best way to master Filmora keyboard shortcuts is through regular practice. Here’s how to do it step-by-step:
- Begin with the Basics: First, focus on core actions like splitting, trimming, and navigation.
- Incorporate Advanced Shortcuts Gradually: Once comfortable with the basics, add shortcuts for effects, transitions, and timeline management.
- Create Mini Projects: Practice shortcuts on small, manageable projects before tackling larger ones.
- Review and Adapt: Periodically revisit this guide to refine your approach and integrate new shortcuts.
Advanced Workflow Optimization with Filmora
To take your editing to the next level, here are advanced techniques combining keyboard shortcuts with Filmora’s rich functionality: You can manage complex projects by producing professional-looking results with these.
1. Filmora Keyboard Shortcuts Quick Multi-Track Editing
Filmora supports multi-track editing, where you can pile layers of videos, audio, and effects on top of one another. Shortcuts really do make managing all these layers a breeze:
- Select multiple clips: Hold Ctrl while clicking on the clips to select them and then apply actions in bulk using shortcuts such as Delete or Ctrl + L.
- Moving entire tracks: Move a whole track up or down by using Alt + Up Arrow or Alt + Down Arrow.
- Grouping timeline: To implement simultaneous changes, group the clips by selecting them and applying Ctrl + G. For un-grouping the clips, use Ctrl + Shift + G.
Best Practice: Use locked tracks (Ctrl + L) so that you do not make accidental edits while working on other layers.
2. Advanced Keyframing with Filmora keyboard shortcuts
Keyframing enables you to control your animation and effects at very detailed levels. While there is no direct shortcut for setting keyframes, you can accelerate:
- Use Ctrl + Left Arrow and Ctrl + Right Arrow to navigate frames exactly.
- You can combine keyframing with timeline markers (Ctrl + M) for a structured editing flow.
- Duplicate keyframes in a hurry using copy and paste attributes from one clip to another (Ctrl + C and Ctrl + Alt + V).
Pro Tip: Keyframing is particularly useful for smooth text animation transitions, overlays, and pan-and-zoom effects.
3. Library Filmora keyboard shortcuts: Media Organization
A library with well-organized media is important for effective editing. Filmora has tools that allow asset management, and shortcuts to save time:
- Find Media: Find a selected file easily using the shortcut Ctrl + F from the project library.
- Favourite Clips: The right-click button from assets marks those clips frequently used to appear in Favourites.
- Sort by Type: Browse and search for media organized by videos, audio, and images in easy view.
Workflow Tip: Save time when preparing a project by pre-sorting files on your computer and sorting the folders before uploading them in Filmora.
4. Export Settings Optimized for High-Quality Output
Exporting is the final and most critical step in video production. Use shortcuts and settings to ensure the best quality:
- Quick Export: Press Ctrl + E to open the export panel instantly.
- Preset Navigation: Use the arrow keys to cycle between the preset formats, MP4, MOV, etc., and preset resolutions.
- Tab Between Fields: Change values of fields: bitrate, resolution, frame rate using keyboard input
Pro Tip: Save frequently used settings to custom export presets and avoid losing the quality of your projects.
Common Issues and Solutions
You will face problems with shortcuts and advanced techniques. Here is how to handle them:
Filmora Keyboard Shortcuts Stuttering or Freezing Timelines
- Solution: Lower the preview quality to “1/2” or “1/4” from the dropdown menu in the preview panel. It does not impact the quality of the final output but improves real-time performance.
Filmora Keyboard Shortcuts Misaligned Clips
- Solution: Snapping (S) should be turned on. Zoom shortcuts (Ctrl + + or Ctrl + -) can then be used for fine adjustments.
Filmora Keyboard Shortcuts Accidental Edits
- Solution: Use Ctrl + Z (Undo) often and save backups often (Ctrl + S).
Future-Proof Your Editing Skills
Filmora is constantly being updated with new features and shortcuts. Here are some steps to future-proof your skills:
- Join the Filmora Community: Participate in forums and online groups where users share tips, tricks, and shortcut discoveries.
- Attend Webinars or Tutorials: Wondershare often releases guides for new updates, ensuring you’re aware of the latest features.
- Test AI Tools: Filmora allows the use of AI-based tools that can automate specific editing tasks. Be receptive to learning how these might supplement manual edits.
Unleashing the Unlimited Possibilities of Filmora
Mastering the Filmora keyboard shortcuts is only the tip of the iceberg. Besides these shortcuts, the software contains many features and tools for bringing creators’ vision into reality. Let’s dive deeper and look at some other advanced techniques and resources that may make your editing journey so much more rewarding.
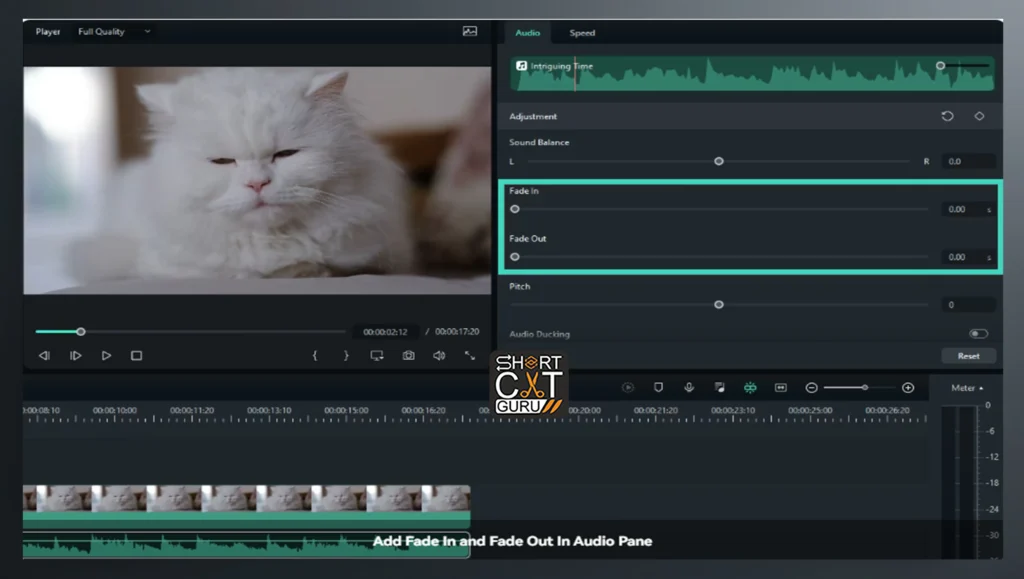
5. Filmora Keyboard Shortcuts Advanced Audio Tools
Video production doesn’t lack sound design in addition to the visuals. Filmora comes with various audio tools that can be further utilized for optimization using shortcuts like;
- Audio Equalizer: One can access the equalizer panel using Ctrl + Shift + E to tune down some audio frequencies for enhanced clarity.
- Noise Reduction : Effects such as noise reduction directly appear in the audio settings where one can remove the hum or static in the background.
- Audio Ducking: Automatically reduce background music volume during dialogue by turning on the ducking feature in audio properties. There isn’t a shortcut for this, but integrating it with quick timeline adjustment shortcuts (Ctrl + B for splits) will feel very fluid.
Pro Tip: Fine-tune your motion tracking and keyframing by using markers (Ctrl + M) to line up transitions between audio and video seamlessly.
6. Filmora Keyboard Shortcuts Motion Tracking and Keyframe
Motion tracking is an advanced feature where objects or text follow a moving element in your footage. Although this process requires some manual input, there are shortcuts that can help make the process more efficient.
- Turn On Motion Tracking: Select your clip, go to the motion tracking panel, and define the tracking box
- Tracking Keyframes: Use the arrow keys to navigate between frames to fine-tune the tracking path.
To keyframe effects or text animation, frame-by-frame is accomplished through the use of shortcuts such as Ctrl + Left Arrow or Ctrl + Right Arrow.
7. Filmora Keyboard Shortcuts LUTs and Color Grading
Filmora has professional-grade color grading with LUTs. You can access all of these features and pair them up with shortcuts for a super-efficient grading workflow:
- Apply LUTs: Open the color grading panel with Ctrl + Shift + G, then select or import a LUT.
- Adjust Brightness and Contrast: Utilize the color grading panel sliders, cycle using Tab
- Saving Custom Presets: Having graded your video, be sure to save it under a preset for ease and consistency of use.
TIP: Mix and blend LUTs with intentional adjustments for a personalization reminiscent of cinema
Additional Resources for Video Editors on Filmora
The way to get ahead would be through the following riches of material:
- Official Filmora Help Centre: Always updated guidelines and FAQs that can be accessed in troubleshooting and exploring any feature.
- Online Communities: The place, like Filmora users’ subreddit page on Reddit, Facebook group, or Wondershare forum, where editors share a lot of tips, templates, and advice.
- YouTube Tutorials: So many creators post step-by-step guides showing off all these innovative Filmora techniques.
- Wondershare Filmora Blog: Get to know the latest features, software upgrades, and trends of the industry.
Expand Your Filmora Know-how
As you go ahead with Filmora, there’s more in-depth, advanced features, tips, and creative workflows. It’s through those that not only will your skills get more refined but also your video will stand at par with the pros’.
8. Making Advanced Use of Text and Title Features
Titles and text overlays play a huge role in the storytelling and branding of a video. Filmora has many tools and templates of texts with shortcuts and creative adjustments available to enhance them:
Filmora Keyboard Shortcuts Quick Access to Titles
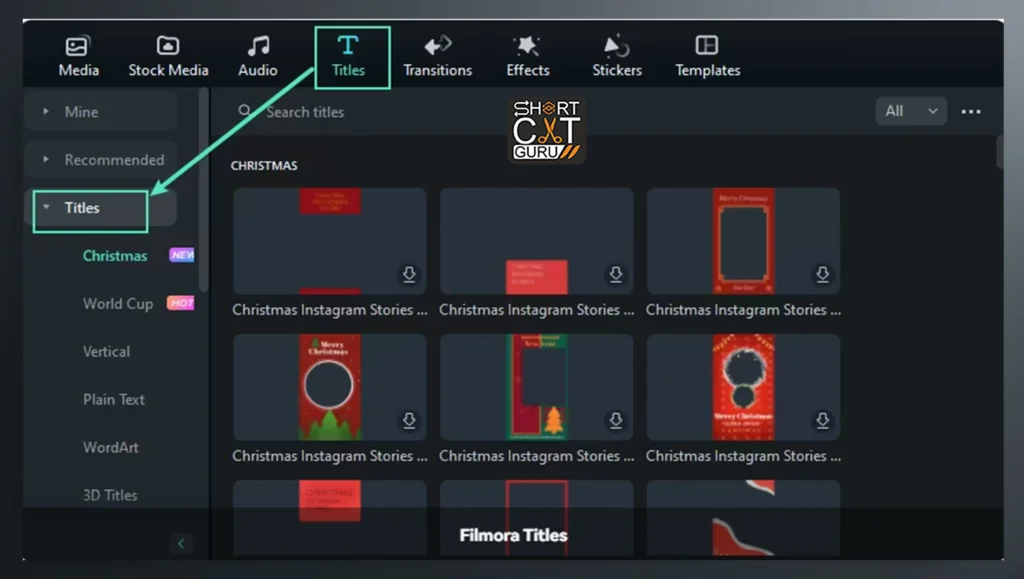
You can add a default title right on your timeline with Ctrl + T. To further customize it, just double-click and edit within the text editor.
- Motion Titles: Place motion effects on text for a lively effect. Use Ctrl + Shift + T to access your text animation options.
- Subtitles: Add subtitles quickly by using the text tool and duplicating the subtitle clip (Ctrl + D) to maintain uniform formatting throughout all your scenes.
Creative Tip: Keyframe text properties, such as opacity, position, or rotation, for an eye-catching effect.
9. Creative Application of Blending Modes
Blending modes allow you to combine clips for the creation of amazing visual effects. Though there are no specific shortcut keys for blending modes, their combination with timeline shortcuts can greatly increase your productivity:
- Open Blending Options: Double-click on a clip to open its properties window and select a blending mode like “Multiply,” “Screen,” or “Overlay.”
- Layer Overlays, Textures, or Light Leaks: Use blending modes to make your video look great.
Pro Tip: Try blending modes, color grading for a touch of professionalism and cinematic view.
10. Filmora Keyboard Shortcuts Advanced Masking Techniques
Masking is a key feature for creating custom shapes, reveals, or even effects in your videos. Filmora’s masking makes it possible to try even the most creative transitions, and designs:
- Apply masks: Select a clip and choose the “Mask” tab from the effects menu to select a shape or draw it.
- Mask Animations: Use mask keyframing to create a smooth reveal or transition.
- Shortcut for Mask Adjustments: Use Ctrl + Arrow Keys to make fine position and size adjustments to the mask.
Creative Tip: Masking is fantastic on text or video clips when creating layered effects and dynamic transitions.
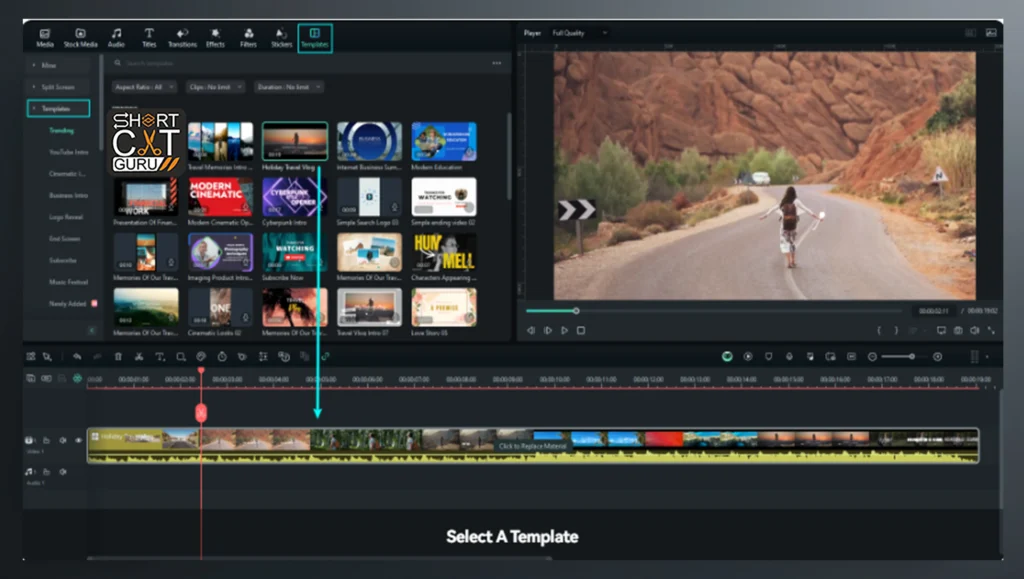
11. Filmora Keyboard Shortcuts Split-Screen Templates
Split-screen templates are perfect for showing a few clips at once, such as comparisons, highlights, or montages:
Split-Screen Panel: Find the split-screen right in the effects menu (Ctrl + Shift + E).
Drag and Drop Clips: Just drag your clips into the split-screen placeholders.
Customize Split-Screen Layouts: Scale, position, or borders of individual clips in the template.
Pro Tip: Combine split-screen effects with transitions to keep a flow throughout your video.
Filmora Features Stay On Top
Always tap into the full potential of Filmora by staying updated with the latest versions and new tools. Wondershare is always adding more features that enhance efficiency and creative possibilities. How to stay updated
- Notification: enable update notifications in the settings of the software.
- Follow Official Channels: subscribe to Wondershare’s official YouTube channel and social media pages for tutorials and new announcements.
- Experiment with Beta Features: Participate in beta programs to test upcoming tools and provide feedback.
Push Your Creative Boundaries
Filmora’s combination of user-friendly design and powerful tools makes it an ideal platform for creators of all levels. By continually practicing and experimenting with new features, you’ll discover innovative ways to bring your ideas to life. Here are some final tips to inspire your creative journey:
- Storyboard Before Editing: plan your scenes and transitions well ahead of time to streamline the workflow.
- Combine Techniques: Mix more advanced tools such as masking, motion tracking, or color grading to create visually rich, layered projects.
- Analyze professional edits: watch videos that industry professionals have done just to get inspiration and do the same using Filmora.
Filmora: your passageway to creative excellence.
Mastering Filmora does not end with shortcuts or even advanced techniques; it is about constantly experimenting, learning, and perfecting your craft. This software has an intuitive design and powerful features, which makes it a very excellent tool for beginners as well as seasoned professionals.
Each keystroke, every effect, and every change brings you closer to having a great story and making videos people will be reminiscing about. The road to excellence comes through practice, persistence, and exploration of new possibilities.
With this all-inclusive guide, you now can fully exercise control over Filmora. Begin your next project and know that among some of the best video editors available, your skill sets and creativity are being upheld. The only limitation then is your imagination.
Path to Mastery
Make every project an exercise towards growing in confidence in the use of Filmora. From mastering shortcuts to accessing advanced editing tools, the skills will evolve, and the videos will reflect passion and creativity.
Take the time to practice, stay curious, and never stop learning. From simple highlight reels to more complex cinematic stories, Filmora is your trusted companion in bringing your vision to life. Now, go create something extraordinary!
| Filmora Keyboard Shortcuts Command | Filmora Keyboard Shortcuts Module | Filmora Keyboard Shortcuts shortcuts |
| New Project | File | Control-N |
| Open Project | File | Control-O |
| Save Project | File | Control-S |
| Save Project As | File | Control-Shift-S |
| Archive Project | File | Control-Shift-A |
| Import Media Files | File | Control-I |
| Record Voiceover | File | Alt-R |
| Preferences | File | Control-, |
| Exit (Mac: Quit) | File | Alt-F4 |
| Undo | File | Control-Z |
| Redo | File | Control-Y |
| Cut | File | Control-X |
| Copy | File | Control-C |
| Paste | File | Control-V |
| Delete | Edit | Delete |
| Ripple Delete (Delete and Close Gap) | Edit | Shift+Delete |
| Select All | Edit | Control-A |
| Copy Effects | Edit | Ctrl-Alt-C |
| Paste Effects | Edit | Ctrl-Alt-V |
| Show Clip Properties | Edit | Alt-E |
| Split | Edit | Control-B |
| Trim Start to Playhead | Edit | Alt-[ |
| Trim End to Playhead | Edit | Alt-] |
| Crop and Zoom | Edit | Alt-C |
| Rotate 90 Clockwise | Edit | Ctrl-Alt-Right Arrow |
| Rotate 90 Counter Clockwise | Edit | Ctrl-Alt-Left Arrow |
| Change Speed and Duration | Edit | Ctrl-R |
| Add Freeze Frame | Edit | Alt-F |
| Detach Audio | Edit | Control-Alt-D |
| Mute | Edit | Control-Shift-M |
| Stabilization | Edit | Alt-S |
| Color Correction | Edit | Control-Alt-C |
| Green Screen | Edit | Control-Alt-G |
| Insert | Edit | Shift-I |
| Overwrite | Edit | Shift-O |
| Rename | Edit | Enter |
| Delete | Edit | Delete |
| Reveal in Explorer(Finder) | Edit | Control-Shift-R |
| Apply | Edit | Alt-A |
| Play | View | Space |
| Stop | View | Control-/ |
| Full screen | View | Alt-Enter |
| Previous Frame | View | Left |
| Next Frame | View | Right |
| Previous Edit Point | View | Up |
| Next Edit Point | View | Down |
| Previous Second | View | Shift-Left |
| Next Second | View | Shift-Right |
| Previous Mark | View | Shift-Up |
| Next Mark | View | Shift-Down |
| Go to Project Beginning | View | Home |
| Go to Project End | View | End |
| Go to Selected Clip Start | View | Shift-Home |
| Go to Selected Clip End | View | Shift-End |
| Zoom in | View | Control+ = |
| Zoom out | View | Control+ – |
| Zoom to Fit timeline | View | Shift-Z |
| Set In point | Marker | I |
| Set Out point | Marker | O |
| Add Marker | Marker | M |
| Delete Marker | Marker | Delete |
| Edit Marker | Marker | Shift-M |
| Jump to the Previous Marker | Marker | Shift-Up |
| Next Marker | Marker | Shift-Down |
| Help | Miscellaneous | F1 |
| Export | Miscellaneous | Control-E |
Conclusion: Transform Your Video Editing Experience
Filmora has keyboard shortcuts in plenty of amounts more than just a timesaving; it’s unlocking that potential within you. Indeed, the commands with full mastery of advanced techniques together with customization of workflows raise it to new heights for any editing.Commit to regular practice and discover new possibilities that software continuously brings to shine creativity behind every project. Filmora is the canvas and shortcuts are tools, so to paint your masterpiece on it.





I don’t think the title of your article matches the content lol. Just kidding, mainly because I had some doubts after reading the article.