Photoshop Frame Tool
Photoshop continues to evolve as the ultimate powerhouse for designers, photographers, and digital artists — and one of its most underrated yet incredibly powerful tools is the Photoshop Frame Tool.
Introduced to streamline layout design, placeholder creation, and non-destructive editing, the Frame Tool has now been supercharged with generative AI capabilities, custom shapes, and smart object integration. Whether you’re mocking up a web layout, designing social media graphics, or preparing print assets, mastering the Photoshop Frame Tool will save you hours and elevate your workflow.
In this comprehensive, step-by-step Frame Tool Photoshop tutorial, we’ll walk you through everything you need to know — from drawing basic frames to generating AI images inside custom shapes, replacing content, adding strokes, and using the Contextual Task Bar like a pro.
Table of Contents
🎯 Why the Photoshop Frame Tool Matters in 2024
Before we jump into the “how,” let’s talk about the “why.”
The Photoshop Frame Tool isn’t just another shape tool. It’s a layout and composition powerhouse that:
- Acts as a non-destructive container for images, text, or graphics
- Automatically converts content into Smart Objects for flexible scaling and editing
- Integrates with Adobe Stock and Libraries for seamless asset management
- Now supports Photoshop AI Frame Tool capabilities — generate images inside frames
- Allows independent transformation of frame vs. content
- Enables stroke customization with patterns, gradients, and alignment controls
In short — it’s your secret weapon for clean, scalable, and editable designs.
💡 Pro Tip: Designers using the Photoshop Frame Tool report 30–50% faster mockup creation times compared to traditional clipping masks or manual resizing.
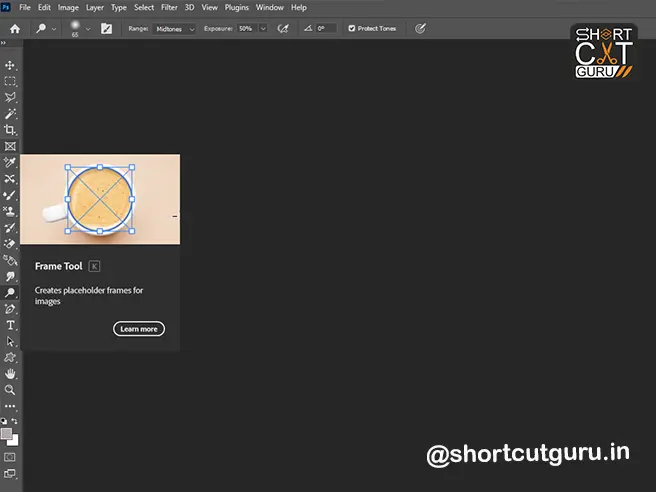
✏️ Section 1: How to Draw an Empty Frame in Photoshop — A Frame Tool Photoshop Tutorial
Step 1: Select the Frame Tool
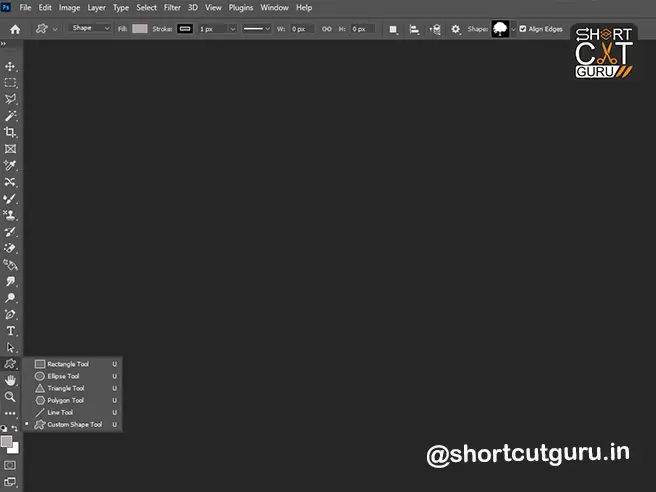
Press K on your keyboard or click the Frame Tool icon in the toolbar (it looks like a hollow rectangle with a dotted border).
🎯 Keyboard Shortcut Tip: “K” is easy to remember — think “K” for “Container.”
Step 2: Choose Your Frame Shape
In the Options Bar at the top, you’ll see four shape options:
- Rectangular Frame (default)
- Elliptical Frame
- Triangle Frame
- Custom Frame (for freehand or path-based shapes)
Step 3: Draw the Frame on Canvas
Click and drag on your canvas to draw the frame. Release to finalize.
✅ Empty frames appear as transparent containers with a dotted border — perfect for planning layouts before adding content.
🔄 Section 2: Convert Shape to Frame Photoshop — Easy Conversion Workflow
Sometimes you’ve already designed a shape or added text — and now you want to turn it into a frame. Photoshop makes this easy.
Step-by-Step Conversion:
- Use any Shape Tool (Rectangle, Ellipse, Polygon, etc.) or the Text Tool (T) to create your element.
- In the Layers Panel, right-click (Windows) or Control-click (Mac) the layer.
- Select “Convert to Frame” from the context menu.
- Click OK.
🚀 Your shape or text is now a fully functional frame — ready to hold images, graphics, or even AI-generated visuals.
📸 Section 3: Draw a Frame Over an Existing Image — Non-Destructive Masking
Need to isolate part of a photo? The Photoshop Frame Tool can mask areas non-destructively.
Here’s How:
- Select the Frame Tool (K).
- Choose your desired frame shape from the Options Bar.
- Click and drag directly over the area of the image you want to frame.
- Release — the image will be automatically masked to fit within the frame boundaries.
⚠️ Note: When you draw a frame over a pixel layer, Photoshop converts it into a Smart Object. This preserves image quality during scaling or transformation.
📂 Section 4: How to Place Images Into Frames (4 Methods) — Frame Tool Photoshop Tutorial
Once your frame is ready, it’s time to populate it. Photoshop offers multiple flexible workflows:
Method 1: Drag from Adobe Stock or Libraries
- Open the Libraries Panel (Window > Libraries).
- Drag an asset directly into the frame on canvas or onto the frame layer in Layers Panel.
- By default, it becomes a linked Smart Object tied to your Creative Cloud Library.
- Want it unlinked? Hold Alt (Win) / Option (Mac) while dragging.
Method 2: Place from Local Disk
- Drag an image file from your computer into the frame.
- It becomes an embedded Smart Object.
- Hold Alt/Option while dragging to make it linked instead.
Method 3: Use File > Place Commands
- Select your frame.
- Go to File > Place Linked or Place Embedded.
- Navigate to your image and click Place.
Method 4: Drag Pixel Layer into Frame
- In the Layers Panel, drag any pixel-based layer into an empty frame layer.
- Photoshop automatically converts it to a Smart Object.
🧠 Smart Objects are your friends — they allow non-destructive scaling, filters, and transformations without losing quality.
🤖 Section 5: Generate AI Images Inside Frames — Photoshop AI Frame Tool in Action
One of the most exciting upgrades to the Photoshop Frame Tool? Generative AI integration.
How to Generate AI Images Within Frames:
- Draw or select any frame shape (rectangular, elliptical, triangle, custom).
- With the frame selected, look for the Contextual Task Bar (appears near the top when a frame is active).
- Click “Generate Image”.
- Enter a text prompt (e.g., “sunset over mountains, cinematic lighting”).
- Photoshop generates an image perfectly fitted to your frame shape.
- Use the Task Bar to adjust style, lighting, or regenerate until satisfied.
🌟 This is revolutionary for rapid prototyping — no more searching for stock images. Just describe what you need, and Photoshop creates it inside your layout.
🧩 Section 6: Understanding Frame Layers in the Layers Panel
Frames aren’t just visual containers — they have a dedicated layer structure in Photoshop.
What You’ll See:
- Frame Layer appears with two thumbnails:
- Left Thumbnail: The frame container (border/shape)
- Right Thumbnail: The inset content (image, graphic, or AI generation)
This dual-thumbnail system lets you edit frame and content independently — a game-changer for precision design.
🖱️ Section 7: How to Select Frame vs. Content (Precision Control)
One of the biggest frustrations in design tools is accidentally moving the wrong element. Photoshop solves this with granular selection control.
Select Both Frame + Content:
- Click once on the image inside the frame (on canvas).
- OR select the entire frame layer in Layers Panel.
→ Now you can move or transform both together.
Select Only the Image (Content):
- Double-click the image on canvas.
- OR click the right thumbnail (content) in the frame layer.
→ Now you can scale, rotate, or reposition the image without affecting the frame.
🔄 Double-click again to return to selecting both.
Select Only the Frame:
- Click the frame’s border on canvas.
- OR select the left thumbnail (frame) in the Layers Panel.
→ Now you can resize or reshape the container without touching the image inside.
💡 This is perfect for adjusting layouts without distorting your visuals.
🔄 Section 8: How to Replace Frame Content — Replace Image in Photoshop Frame Tool
Made a mistake? Need to swap images? No problem.
5 Ways to Replace Frame Content:
- Drag new image from Libraries Panel into frame (canvas or layer).
- Drag image from local disk into frame.
- Select frame → Properties Panel → Use “Inset Image” options:
- Find on Adobe Stock
- Open Libraries
- Place From Local Disk (Linked/Embedded)
- File > Place Linked/Embedded → Select new image.
- Use Contextual Task Bar → “Change Image” or “Generate New Image.”
🧹 Old content is automatically replaced — no layer cleanup needed.
🖌️ Section 9: Add Stroke to Frame Photoshop — Patterns, Gradients & Alignment
Want to make your frames pop? Add strokes with advanced styling options.
Step-by-Step:
- In Layers Panel, select your frame layer.
- Open Properties Panel (Window > Properties).
- Under Stroke Options, set:
- Type: Solid Color, Gradient, or Pattern
- Width: In pixels (e.g., 2px, 5px, 10px)
- Alignment: Inside, Center, or Outside
- Pattern Angle (Photoshop 21.2+): Rotate pattern orientation
🎨 Pro Tip: Use gradient strokes for modern UI designs or pattern strokes for textured, vintage looks.
🔧 Section 10: Advanced Tips & Hidden Features — Mastering the Photoshop Frame Tool
💡 Tip 1: Use Frames for UI/UX Mockups
Create app screens by framing button areas, hero images, or card layouts. Resize globally without distorting content.
💡 Tip 2: Nest Frames for Complex Layouts
Place frames inside other frames to build grids, carousels, or magazine spreads.
💡 Tip 3: Export Frames as Assets
Right-click frame layer → Export As → Save individual framed elements for web or mobile.
💡 Tip 4: Use Photoshop Frame Tool with Artboards
Combine Frame Tool with Artboards for multi-screen design workflows (web, mobile, tablet).
💡 Tip 5: Keyboard Shortcuts for Speed
- K = Frame Tool
- V = Move Tool (to reposition frames)
- Ctrl+T (Cmd+T) = Free Transform (scale/rotate frame or content)
- Double-click content = Isolate for editing
How to Use Frame Tool in Photoshop
Learn how to efficiently organize and mask content using Photoshop Frame Tool. This guide walks you through creating placeholder frames, dragging layers into frames for automatic clipping, and using frames to streamline your design workflow — perfect for UI mockups, photo collages, and layout design.
❓ FAQ: Photoshop Frame Tool (Quick Answers)
Q: Does the Frame Tool work in Photoshop Elements?
A: No — Photoshop Frame Tool is only available in Photoshop CC (2020 and later).
Q: Can I animate frames in After Effects?
A: Yes! Export frame layers as PNG sequences or Smart Objects — they retain structure in AE.
Q: Why is my image blurry after placing in frame?
A: Ensure you’re using high-res source images. Frames convert content to Smart Objects — but won’t enhance low-res files.
Q: Can I use custom shapes as frames?
A: Yes! Select “Custom” in Photoshop Frame Tool options and draw freehand or use a path — perfect for convert shape to frame Photoshop workflows.
Q: How do I remove a frame but keep the image?
A: Right-click frame layer → “Release Frame” — content becomes regular layer.
🏁 Final Thoughts: Unlock Your Design Potential with the Photoshop Frame Tool
The Photoshop Frame Tool is no longer just a placeholder utility — it’s a central hub for AI-powered design, non-destructive workflows, and professional layout control.
Whether you’re a beginner learning the ropes or a seasoned pro optimizing your process, mastering this tool will:
✅ Speed up your design workflow
✅ Improve layout precision
✅ Enable AI-assisted creativity (Photoshop AI Frame Tool)
✅ Simplify client revisions
✅ Future-proof your Photoshop skills
So go ahead — press K, draw a frame, generate an AI image, and watch your designs come to life faster than ever.
📢 Call to Action
Loved this Frame Tool Photoshop tutorial?
👉 Save it for later
👉 Share it with your design team
👉 Follow us for more Photoshop pro tips
Got questions? Drop them in the comments — we reply to every one!


