Introduction
Photoshop Keyboard Shortcuts: In the world of digital art and design, Adobe Photoshop stands as a powerhouse. Whether you’re editing photos, creating graphics, or designing layouts, mastering Photoshop shortcuts can transform your workflow. By learning these essential Photoshop hotkeys and Adobe Photoshop shortcut keys, you can save time, increase productivity, and unleash your creativity. In this guide, we’ll explore a comprehensive list of shortcuts, from popular basics to advanced techniques, tailored to help you navigate Photoshop like a pro.
Table of Contents Photoshop Hotkeys

Popular Photoshop Shortcut Keys 🚀
Starting with the basics, these popular Photoshop shortcuts are essential for every user. They cover fundamental actions that streamline common tasks.

| Name | Windows | Mac | Operation |
| Copy | Ctrl + C | Cmd + C | Quickly copy selected content. |
| Paste | Ctrl + V | Cmd + V | Paste the copied content into your document. |
| Undo | Ctrl + Z | Cmd + Z | Undo the last action. |
| Redo | Ctrl + Shift + Z | Cmd + Shift + Z | Redo the last undone action. |
| Save | Ctrl + S | Cmd + S | Regularly save your work to prevent data loss. |
| Cut | Ctrl + X | Cmd + X | Cut the selected area or layer. |
| Save As | Ctrl + Shift + S | Cmd + Shift + S | Save the document under a new name. |
| New Document | Ctrl + N | Cmd + N | Create a new document. |
| Open | Ctrl + O | Cmd + O | Open an existing document. |
| New Layer | Ctrl + Shift + N | Cmd + Shift + N | Make a fresh layer. |
| Duplicate Layer | Ctrl + J | Cmd + J | Duplicate the active layer. |
| Zoom In | Ctrl + + | Cmd + + | Zoom in on the canvas. |
| Zoom Out | Ctrl +- | Cmd +- | (Windows) / |
| Fit to Screen | Ctrl + 0 | Cmd + 0 | Adjust the document to the available screen size. |
| Toggle Full Screen | F | F | Toggle between different screen modes. |
| Deselect | Ctrl + D | Cmd + D | select the active selection. |
| Select All | Ctrl + A | Cmd + A | Select the entire canvas. |
| Invert Selection | Ctrl + Shift + I | Cmd + Shift + I | Reverse the selection that is currently selected. |
| Hide Selection | Ctrl + H | Cmd + H | Hide the selection border. |
| Merge Layers | Ctrl + E | Cmd + E | Merge the selected layer with the layer below. |
Use Photoshop Shortcuts Function Keys 🎹
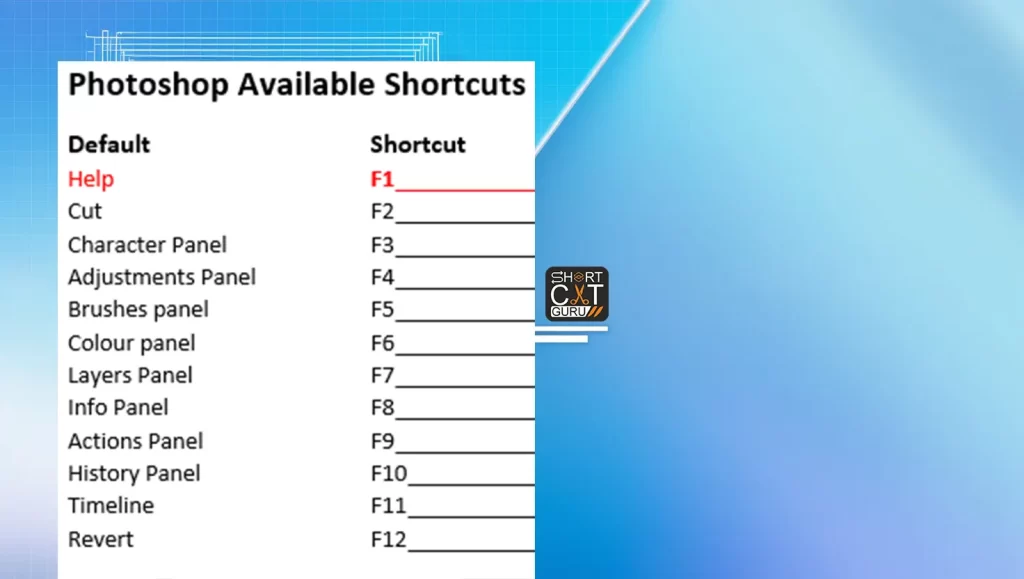
Function keys can significantly enhance your Photoshop experience. Here’s a rundown of some essential function key shortcuts:
| F1: Open Photoshop Help | Access Photoshop’s help documentation for guidance and troubleshooting. |
| F2: Cut | Cut the selected area or layer (customizable). |
| F3: Copy | Copy the selected area or layer (customizable). |
| F4: Paste | Paste the copied content (customizable). |
| F5: Open Brush Panel | Quickly open the Brush panel for brush settings and adjustments. |
| F6: Open Color Panel | Access the Color panel to manage and select colors. |
| F7: Open Layers Panel | Display the Layers panel for organizing and managing layers. |
| F8: Open Info Panel | Show the Info panel for detailed information about your document and tools. |
| F9: Open Actions Panel | Access the Actions panel to create, record, and manage actions. |
| F10: Open Menu Bar | Highlight the menu bar, enabling navigation through menus using the keyboard. |
| F11: Toggle Full Screen Mode | Switch between standard, full screen, and full screen with menu bar modes. |
| F12: Revert | Revert the document to the last saved version. |
| Shift + F1: Show Tool Tips | Toggle the visibility of tooltips for interface elements. |
| Shift + F2: Decrease Brush Size | Reduce the size of the brush. |
| Shift + F3: Increase Brush Size | Increase the size of the brush. |
| Shift + F4: Open Fill Dialog | Open the Fill dialog box for filling selections with colors, patterns, or content aware fill. |
| Shift + F5: Open Feather Selection | Access the Feather Selection dialog to soften selection edges. |
| Shift + F6: Inverse Selection | Invert the current selection, selecting everything that was not selected before. |
| Shift + F7: Toggle Layer Visibility | Show or hide the currently selected layer(s). |
| Shift + F8: Toggle Ruler Visibility | Show or hide rulers on the canvas. |
| Shift + F9: Open Styles Panel | Access the Styles panel to apply layer styles. |
| Shift + F10: Open Navigator Panel | Show the Navigator panel for a bird’s eye view of your document. |
| Shift + F11: Open Histogram Panel | Display the Histogram panel to view the tonal range of your image. |
| Shift + F12: Open Notes Panel | Open the Notes panel to add and view notes in your document. |
| Alt + F4: Close Photoshop | Close the Photoshop application. |
Selection Photoshop Shortcuts Tools 🔍
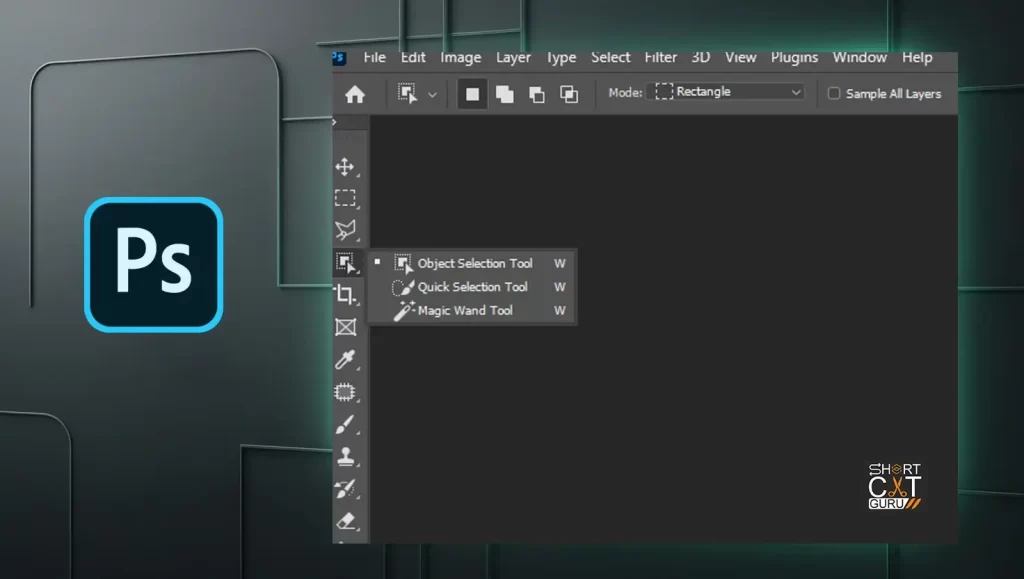
In Photoshop, choosing the appropriate area of an image is essential. These shortcuts make it easier to choose and modify selections:
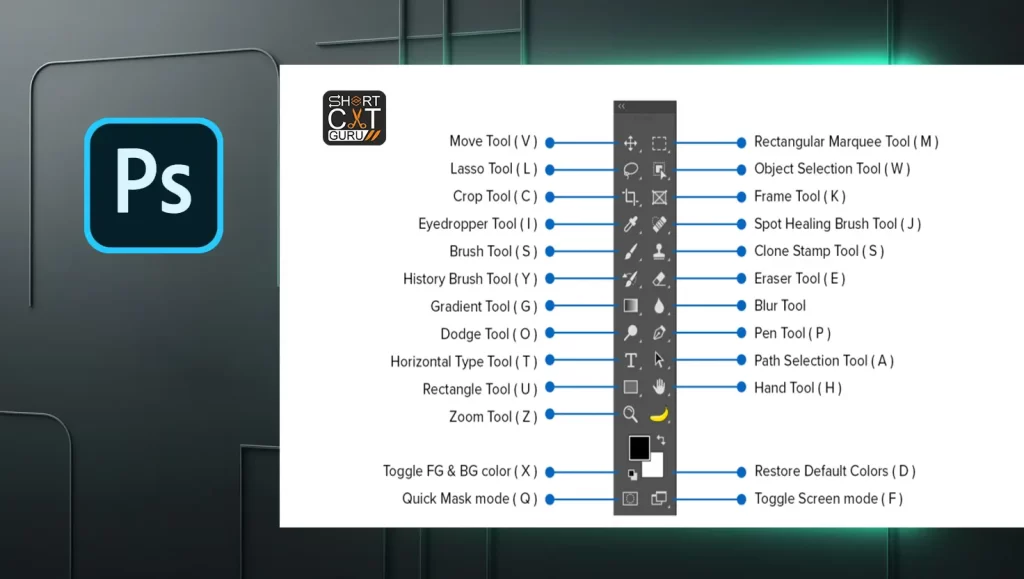
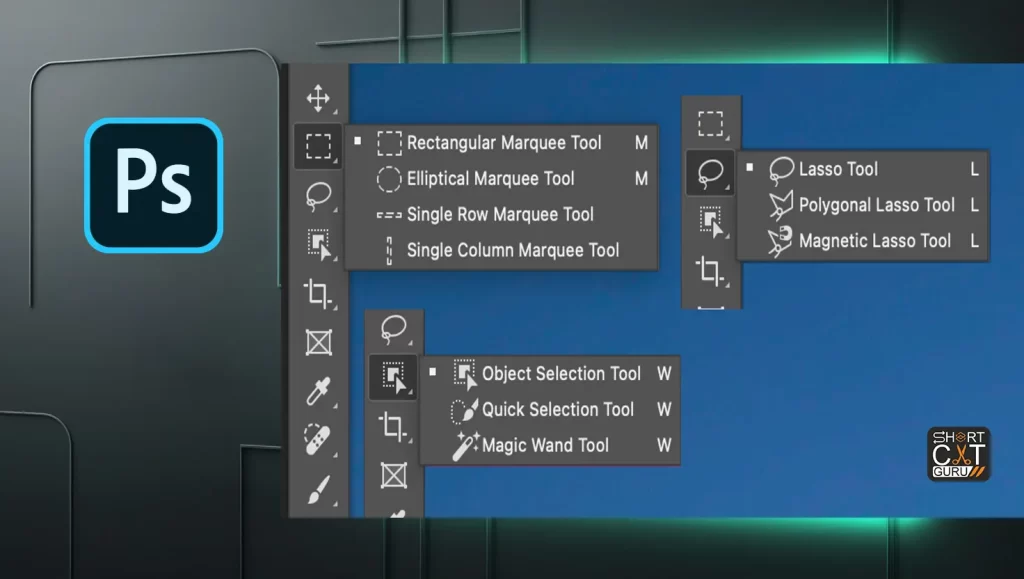
- Marquee Tool: M – Rectangular and Elliptical selections.
- Lasso Tool: L – Freehand, Polygonal, and Magnetic Lasso.
- Quick Selection Tool: W – Make fast decisions on areas based on texture and color.
- Magic Wand Tool: W – Select similarly colored areas.
- Deselect: Ctrl + D (Windows) / Cmd + D (Mac) – Deselect any active selection.
View Images Photoshop Shortcut Keys 🖼️
Navigating and viewing your work efficiently can save time and provide better control over your edits.
- Fit on Screen: Ctrl + 0 (Windows) / Cmd + 0 (Mac) – Fit the image to the screen size.
- Actual Pixels: Ctrl + 1 (Windows) / Cmd + 1 (Mac) – View the image at 100% zoom.
- Zoom In: Ctrl + + (Windows) / Cmd + + (Mac) – Zoom into the image.
- Zoom Out: Ctrl + – (Windows) / Cmd + – (Mac) – Zoom out of the image.
- Hand Tool: H – Move around the canvas.
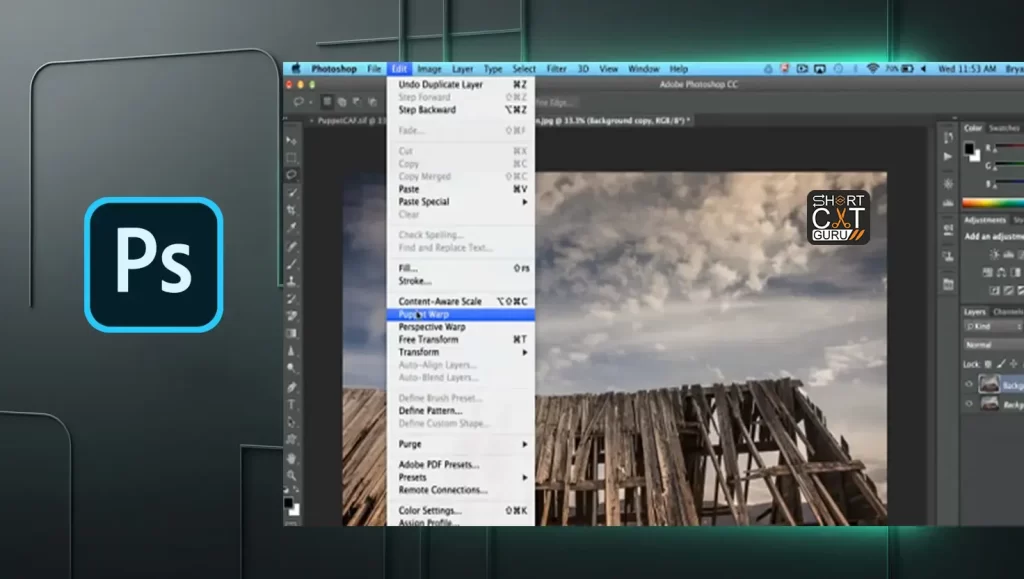
Use Puppet Warp Adobe Photoshop Shortcut Keys 🧵
Puppet Warp is a powerful tool for manipulating image elements with precision.
- Activate Puppet Warp: Ctrl + Shift + X (Windows) / Cmd + Shift + X (Mac)
- Add Pin: Click on the image to add control points.
- Move Pin: Drag a pin to manipulate the image.
- Rotate Pin: Alt-click (Windows) / Option-click (Mac) and drag to turn.
- Remove Pin: Alt-click (Windows) / Option-click (Mac) on a pin to remove it.
Use Select and Mask Photoshop Hotkeys🎨
Fine-tuning selections and masks is a breeze with the Select and Mask workspace.
- Open Select and Mask: Ctrl + Alt + R (Windows) / Cmd + Option + R (Mac)
- Refine Edge Brush: R – Improve the edges of your selection.
- Brush Tool: B – Paint over areas to add or subtract from the selection.
- Hand Tool: H – Within the Select and Mask workspace, move the picture.
- Zoom Tool: Z – Within the workspace, zoom in or out.
Use the Filter Gallery Photoshop Shortcut Keys 🎨
The Filter Gallery offers various artistic filters to enhance your images.
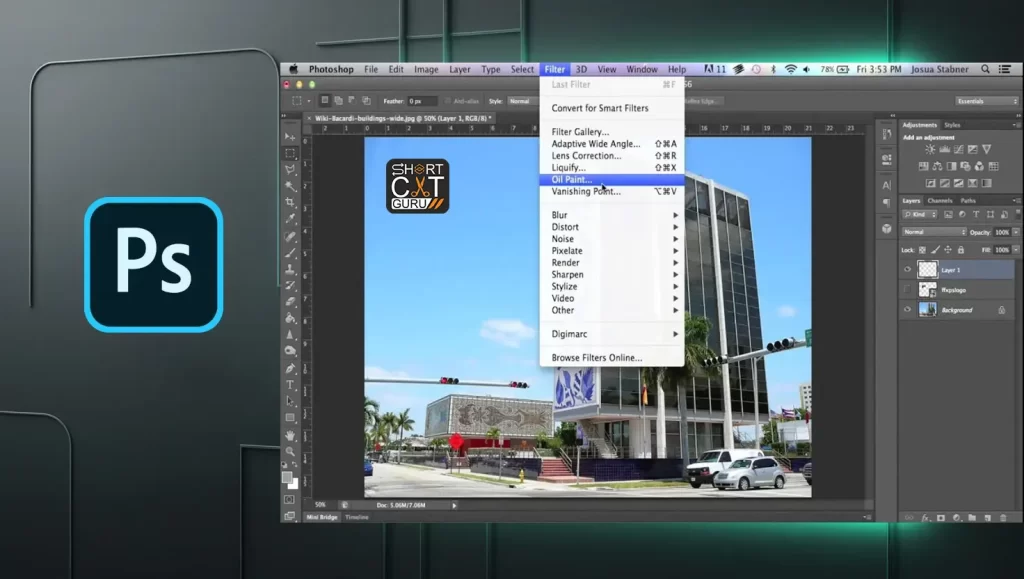
- Open Filter Gallery: Ctrl + F (Windows) / Cmd + F (Mac)
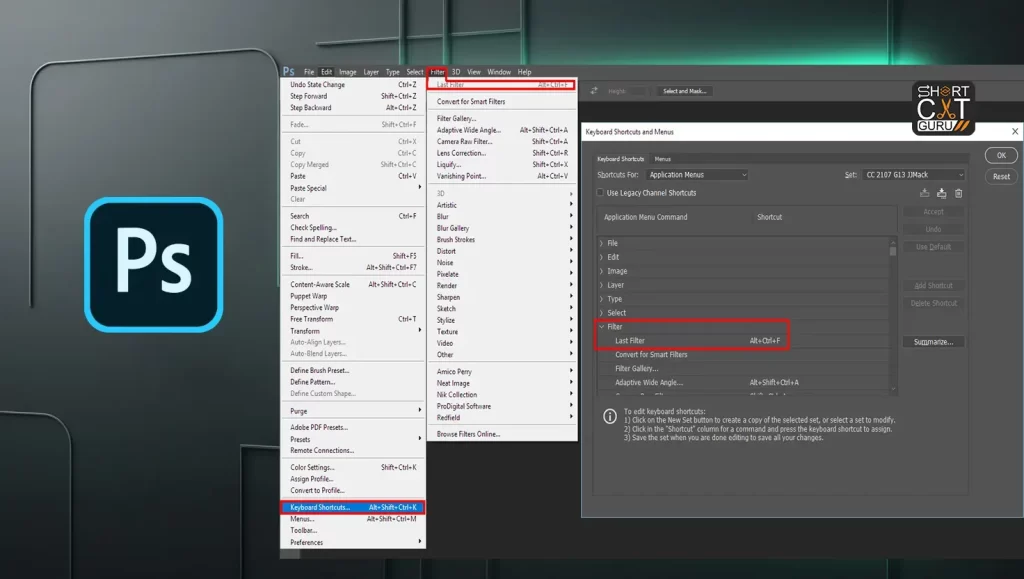
- Apply Last Filter: Ctrl + Alt + F (Windows) / Cmd + Option + F (Mac)
- Fade Filter: Ctrl + Shift + F (Windows) / Cmd + Shift + F (Mac)
- Apply Specific Filter: Navigate through the menu to choose a filter.
- Preview Filter: Check the preview box to see the effect.
Use the Liquify Filter Photoshop Hotkeys💧
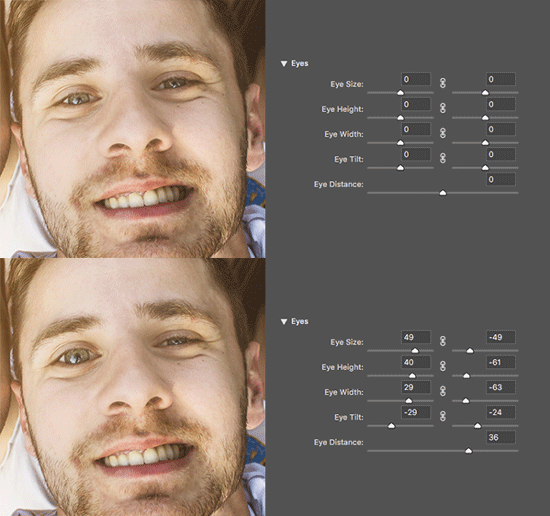
The Liquify filter is ideal for creative manipulations and subtle adjustments.
- Open Liquify: Ctrl + Shift + X (Windows) / Cmd + Shift + X (Mac)
- Forward Warp Tool: W – Push pixels forward as you drag.
- Reconstruct Tool: R – Revert areas to their original state.
- Twirl Clockwise Tool: C – Twirl pixels around the center of your brush.
- Pucker Tool: S – Squeeze pixels towards the center of your brush.
Use Vanishing Point Photoshop Shortcuts 🔲
The Vanishing Point tool is great for perspective edits.
- Open Vanishing Point: Ctrl + Alt + V (Windows) / Cmd + Option + V (Mac)
- Create Planes: Click to define a perspective plane.
- Stamp Tool: S – Clone parts of your image in perspective.
- Grid: Toggle the grid visibility for precise alignment.
- Transform Tool: T – Change the chosen area’s point of view.
Use the Camera Raw Dialog Box Photoshop Hotkeys📸
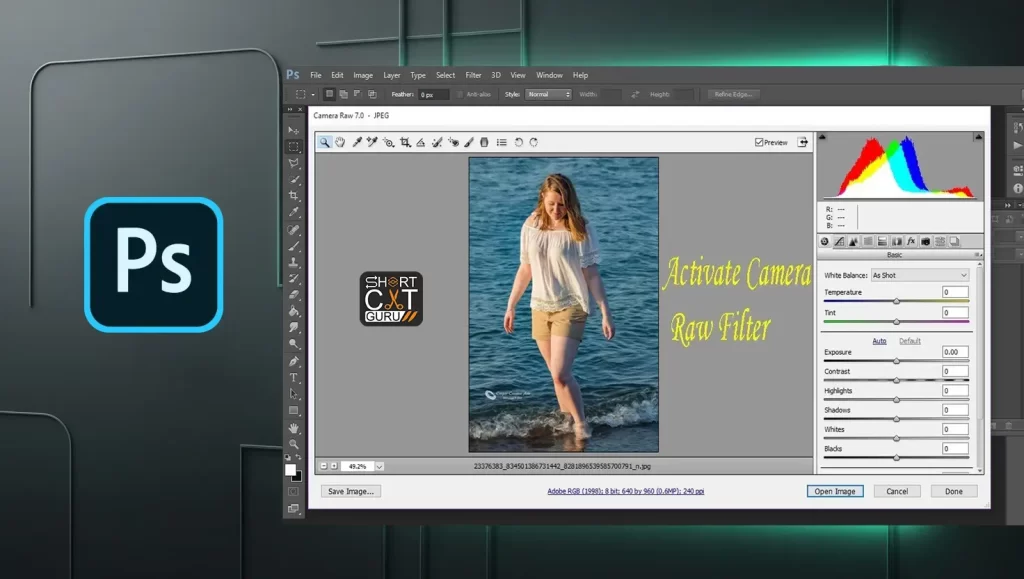
The Camera Raw dialog is where you will make adjustments to raw images.
- Open Camera Raw: Ctrl + R (Windows) / Cmd + R (Mac)
- Basic Adjustments: Adjust exposure, contrast, and other basic settings.
- Tone Curve: Fine-tune the tonal range of your image.
- Detail Panel: Sharpen your image and reduce noise.
- Lens Corrections: Correct lens distortions.
Use the Black-and-White Dialog Box Photoshop Shortcuts🖤
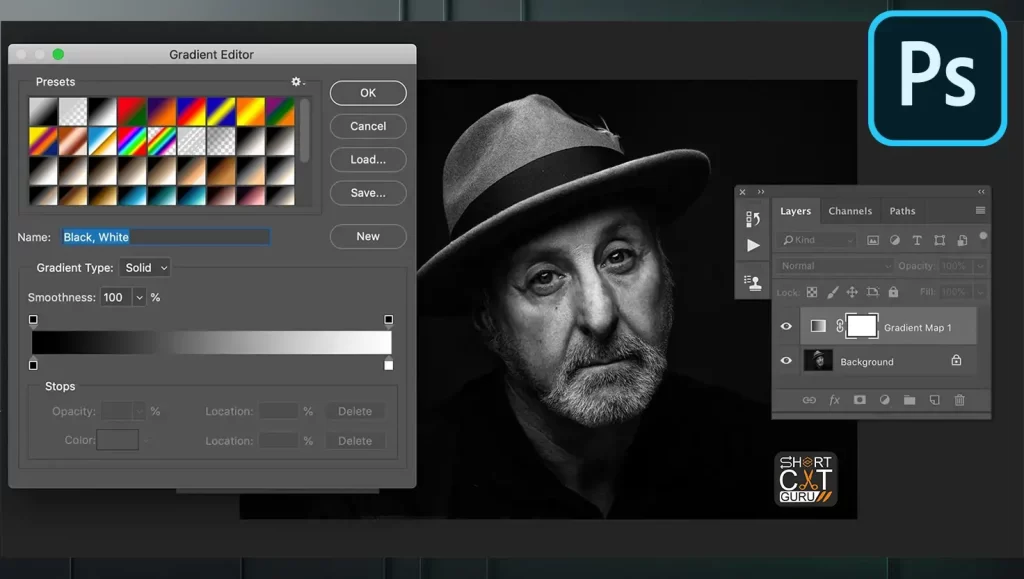
Convert and fine-tune black-and-white images.
- Open Black-and-White Dialog Box: Ctrl + Shift + Alt + B (Windows) / Cmd + Shift + Option + B (Mac)
- Adjust Color Sliders: Modify the conversion by adjusting individual color sliders.
- Preset Options: Choose from various presets.
- Tint Option: Apply a tint to the black-and-white image.
- Preview: Check the preview box to see changes in real-time.
Use Curves Photoshop Shortcuts 📈
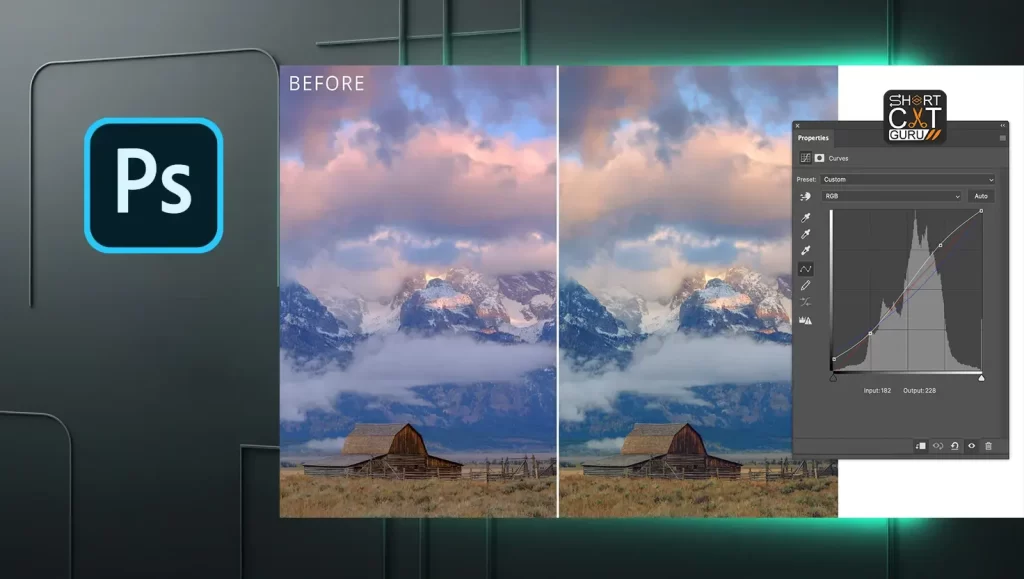
A curve is an accurate tool for adjusting the tones in an image.
- Open Curved segments: Ctrl + M (Windows) / Cmd + M (Mac)
- Add Points: Click on the curve to add control points.
- Adjust Points: Drag points to adjust the image’s tones.
- Channel Selection: Adjust specific color channels.
- Auto Button: Apply automatic adjustments.
Select and Move Objects Photoshop Shortcut Keys🔄
Selecting and moving objects efficiently is key to effective editing.
- Move Tool: V – Move selected objects or layers.
- Free Transform: Ctrl + T (Windows) / Cmd + T (Mac) – Scale, rotate, and skew objects.
- Auto-Select Layer: Ctrl + Click (Windows) / Cmd + Click (Mac) on the object.
- Align Objects: Use the options in the Move Tool’s control panel.
- Distribute Objects: Evenly space selected objects.
Transform Selections, Selection Borders, and Paths 🔄
Transforming selections and paths allows for precise editing and adjustments.
- Warp: Ctrl + T then Warp option – Apply a warp transformation to a selection or path.
- Transform Selection: Ctrl + T (Windows) / Cmd + T (Mac) – Change the course of selection.
- Scale: Ctrl + Alt + Shift + T (Windows) / Cmd + Option + Shift + T (Mac) – Scale paths or shapes.
- Rotate: Ctrl + Alt + Shift + R (Windows) / Cmd + Option + Shift + R (Mac) – Rotate the selected path or shape.
Edit Paths Photoshop Hotkeys ✏️
Editing paths is crucial for precision in vector artwork and selections.
- Pen Tool: P – Make auto shapes and routes.
- Direct Selection Tool: A – Select and adjust individual path points.
- Add Anchor Point Tool: + – Add points to a path.
- Delete Anchor Point Tool: – – Remove points from a path.
- Convert Point Tool: Shift + C – Convert smooth points to corner points and vice versa.
Use for Painting Photoshop Shortcut Keys🎨
These shortcuts enhance the painting experience, offering quick access to brush settings and tools.
- Brush Tool: B – Paint using the currently selected brush.
- Change Brush Size: [ and ] – Decrease/increase brush size.
- Change Brush Hardness: Shift + [ and Shift + ] – Soften/harden brush edges.
- Eyedropper Tool: I – Sample a color from the image.
- Toggle Brush Panel: F5 – The Brush panel can be opened or closed.
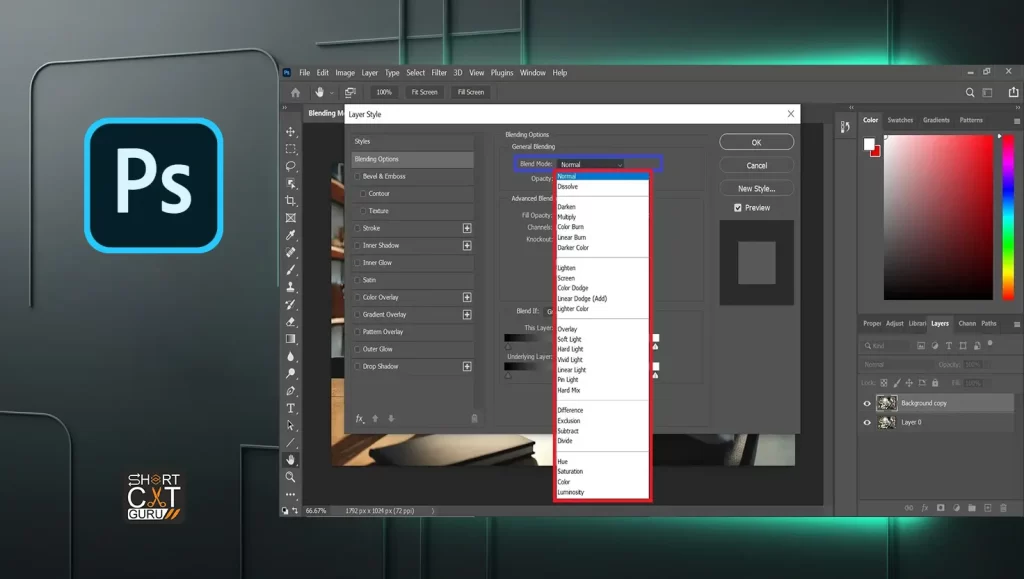
Use for Blending Modes Adobe Photoshop Keyboard Shortcuts🌈
Blending modes alter how layers interact with each other, creating various effects.
- Cycle Through Blending Modes: Shift + + or Shift + – – Cycle forward/backward through blending modes.
- Normal: Shift + Alt + N (Windows) / Shift + Option + N (Mac) – The Standard method of overlapping.
- Multiply: Shift + Alt + M (Windows) / Shift + Option + M (Mac) – Darken the image.
- Screen: Shift + Alt + S (Windows) / Shift + Option + S (Mac) – Lighten the image.
- Overlay: Shift + Alt + O (Windows) / Shift + Option + O (Mac) – Increase contrast.
Select and Edit Text Adobe Photoshop Shortcut Keys ✏️
Editing text is made easy with these shortcuts, allowing for quick adjustments.
- Horizontal Type Tool: T – Create and edit text.
- Select All Text: Ctrl + A (Windows) / Cmd + A (Mac) – Choose every text in the layer.
- Bold Text: Ctrl + Shift + B (Windows) / Cmd + Shift + B (Mac) – Toggle bold styling.
- Italicize Text: Ctrl + Shift + I (Windows) / Cmd + Shift + I (Mac) – Toggle italic styling.
- Change Text Size: Ctrl + Shift + > or < (Windows) / Cmd + Shift + > or < (Mac) – Increase/decrease text size.
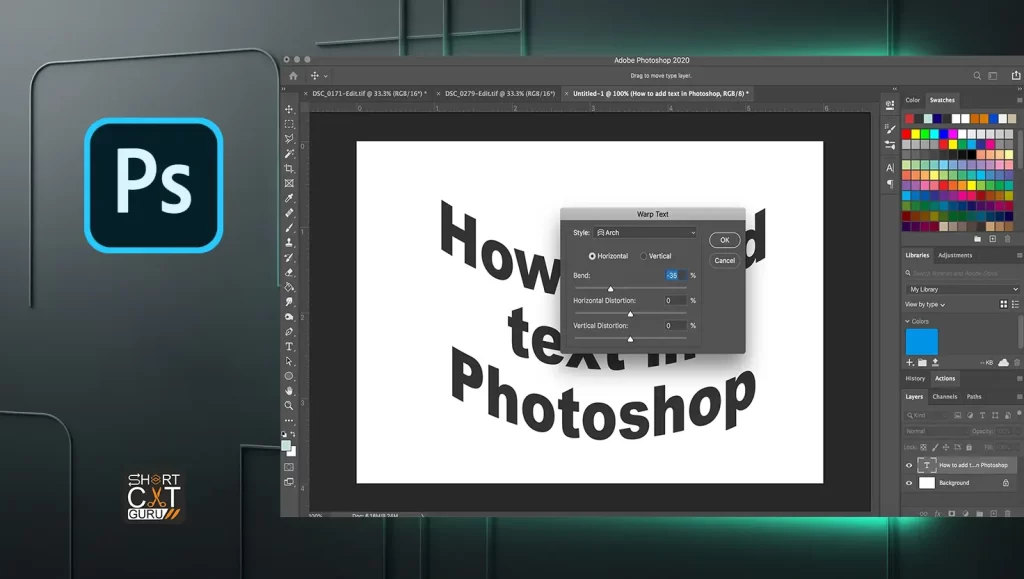
Format Type Photoshop Keyboard Shortcuts ✒️
Formatting text adds style and readability to your designs.
- Character Panel: Press Ctrl + T on Windows or Cmd + T on Mac to access the Character panel.
- Paragraph Panel: Ctrl + Alt + T (Windows) / Cmd + Option + T (Mac) – Open the Paragraph panel.
- Kerning: Alt + Left/Right Arrow (Windows) / Option + Left/Right Arrow (Mac) – Adjust spacing between characters.
- Tracking: Ctrl + Alt + Left/Right Arrow (Windows) / Cmd + Option + Left/Right Arrow (Mac) – Adjust spacing between groups of characters.
- Baseline Shift: Shift + Alt + Up/Down Arrow (Windows) / Shift + Option + Up/Down Arrow (Mac) – Shift text baseline.
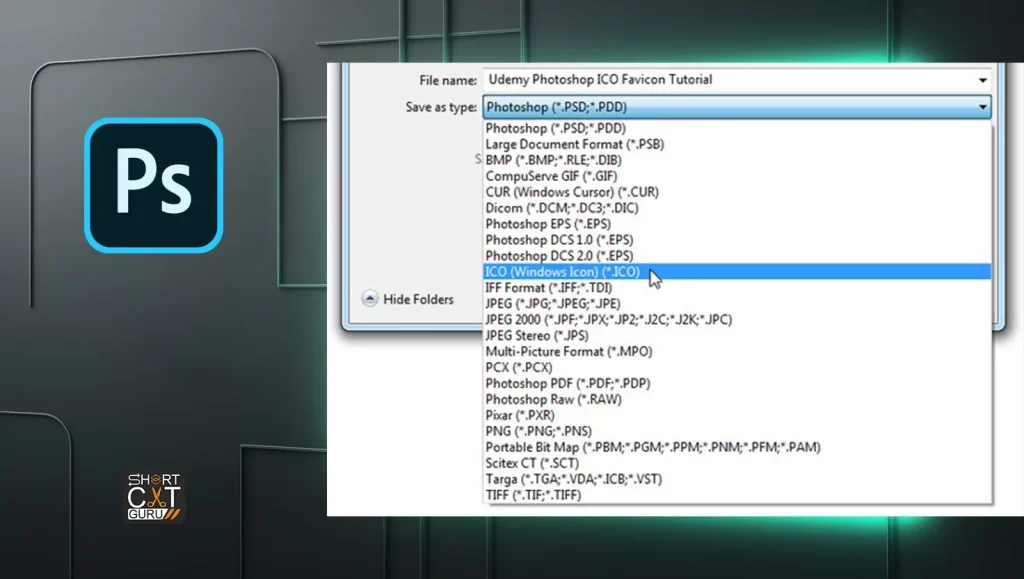
Slice and Optimize Photoshop Hotkeys🍰
Slicing and optimizing images is crucial for web design and digital assets.
- Slice Tool: C – Create slices for web export.
- Slice Select Tool: Shift + C – Select and modify slices.
- Save for Web: Ctrl + Shift + Alt + S (Windows) / Cmd + Shift + Option + S (Mac) – Optimize images for web.
- Optimize to File Size: Set a target file size for optimization.
- Preview Optimized Image: Preview how the image will look when optimized.
Use Panels Photoshop Keyboard Shortcuts🗂️
Panels are essential for managing layers, adjustments, and more.
- Layers Panel: F7 – Show/hide the Layers panel.
- Adjustments Panel: F8 – Access adjustment layers and presets.
- Properties Panel: Ctrl + Alt + P (Windows) / Cmd + Option + P (Mac) – View properties of the selected layer.
- Navigator Panel: F9 – Navigate and zoom around your image.
- History Panel: F10 – View and revert to previous states of your document.
Use the Actions Panel Photoshop Hotkeys 🎬
Repetitive actions are automated using the Actions panel, saving time and effort.
- Open Actions Panel: Alt + F9 (Windows) / Option + F9 (Mac)
- Create New Action: Start recording a new action.
- Play Action: Execute the selected action.
- Stop Recording: End the action recording.
- Edit Action: Modify steps within an action.
Use Adjustment Layers Photoshop Shortcuts🌀
Adjustment layers allow for non-destructive edits, providing flexibility in your workflow.
- Create New Adjustment Layer: Click the adjustment layer icon at the bottom of the Layers panel.
- Curves Adjustment: Ctrl + M (Windows) / Cmd + M (Mac) – Adjust the tonal range.
- Levels Adjustment: Ctrl + L (Windows) / Cmd + L (Mac) – Adjust image brightness and contrast.
- Hue/Saturation Adjustment: Ctrl + U (Windows) / Cmd + U (Mac) – Modify colors and saturation.
- Black & White Adjustment: Convert images to grayscale with control over individual color contributions.
Utilize the Frames Mode on the Animation Panel 🎥
The Animation panel is necessary for making GIFs and frame-by-frame animations.
- Open Animation Panel: Window > Timeline
- Create Frame Animation: Click on “Create Frame Animation” in the panel.
- Duplicate Frame: Ctrl + Alt + J (Windows) / Cmd + Option + J (Mac)
- Set Frame Delay: Choose the duration each frame should display.
- Play Animation: Preview your animation within the panel.
Use the Brush Panel Photoshop Shortcut Keys 🎨
There are several ways to customize the brush settings using the Brush panel.
- Open Brush Panel: F5
- Change Brush Tip Shape: Customize the shape and size of your brush.
- Adjust Brush Dynamics: Set jitter and control options for brush effects.
- Save Brush Preset: Save your customized brush settings for future use.
- Load Brush Set: Access additional brush sets.
Use the Channels Panel Photoshop Shortcuts📊
Channels are vital for color information and selections based on color.
- Open Channels Panel: Window > Channels
- View Individual Channels: Click on individual channels (e.g., Red, Green, Blue).
- Create New Channel: Add a new channel for additional editing.
- Load Channel as Selection: Ctrl + Click (Windows) / Cmd + Click (Mac) on a channel thumbnail.
- Merge Channels: Combine channels into a single image.
Use the Clone Source Panel Photoshop Shortcuts🖨️
The Clone Source panel is essential for fine-tuning cloning operations.
- Launch the Clone Source Panel: Window > Clone Source
- Set Clone Source: Define multiple clone sources for more options.
- Adjust Clone Source Offset: Fine-tune the position of the cloned area.
- Clone Source Rotation: Rotate the cloned source for more natural edits.
- Flip Clone Source: Rotate the copied picture either up or down.
Use the Color Panel Photoshop Keyboard Shortcuts🌈
The Color panel provides tools for selecting and managing colors.
- Open Color Panel: Window > Color
- Select Foreground/Background Colors: Click to choose colors.
- Color Sliders: Adjust RGB, HSB, or other color model values.
- Color Picker: Access the full range of colors available.
- Save Color Swatches: Save frequently used colors for quick access.
Use the History Panel Adobe Photoshop Keyboard Shortcuts 📜
You can go back in time and observe changes in the History panel.
- Open History Panel: Window > History
- Undo Multiple Steps: Click on a previous state to revert.
- Create Snapshot: Save the current state for future reference.
- History Brush Tool: Y – Paint back from a previous state.
- Clear History: Remove history states to free up memory.
Use the Info Panel Photoshop Shortcut Keys ℹ️
The Info panel offers comprehensive details regarding your document and the location of the pointer.
- Open Info Panel: Window > Info
- Color Information: View RGB, CMYK, and other color values.
- Cursor Coordinates: Track the position of your cursor in the document.
- Measurement Information: View dimensions and angles for precise editing.
- Layer Information: Get details about the active layer.
Use the Layers Panel Photoshop Keyboard Shortcuts🗂️
Photoshop’s foundation is the Layers panel, which enables structured, non-destructive manipulation.
- Create New Layer: Ctrl + Shift + N (Windows) / Cmd + Shift + N (Mac)
- Duplicate Layer: Ctrl + J (Windows) / Cmd + J (Mac)
- Merge Layers: Ctrl + E (Windows) / Cmd + E (Mac)
- Group Layers: Ctrl + G (Windows) / Cmd + G (Mac)
- Lock Layer: Lock image pixels, transparent pixels, or the layer’s position.
Use the Layer Comps Panel Photoshop Shortcuts🗂️
Layer Comps are useful for experimenting with different design variations.
- Open Layer Composites Panel: Window > Layer Comps
- Create New Layer Comp: Save the current state of layers.
- Update Layer Comp: Modify an existing comp with new settings.
- Delete Layer Comp: Remove unwanted comps.
- Apply Layer Comp: Revert to a saved comp for comparison.
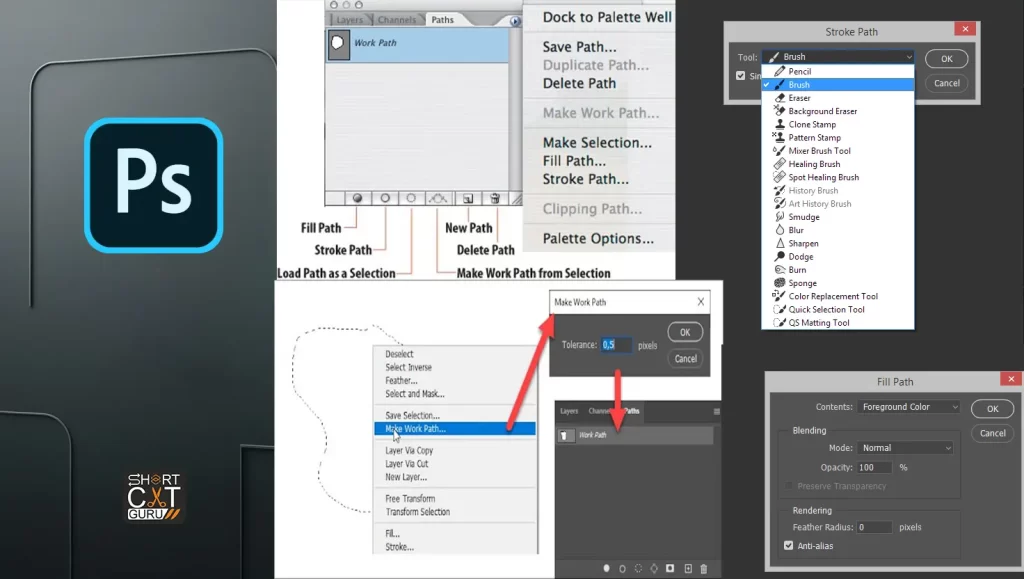
Use the Paths Panel Photoshop Shortcut Keys 🌐
The Paths panel manages vector paths, essential for precision work.
- Open Paths Panel: Window > Paths
- Create New Path: Use the Pen Tool or Shape Tool.
- Save Path: Store the path for future use.
- Load Path as Selection: Ctrl + Click (Windows) / Cmd + Click (Mac) on the path thumbnail.
- Stroke Path: Apply a stroke to the path using a brush or other tool.
Use the Swatches Panel Photoshop Hotkeys🎨
The Swatches panel stores frequently used colors for easy access.
- Open Swatches Panel: Window > Swatches
- Add New Swatch: Add a fresh hue to the panel.
- Delete Swatch: Remove a color swatch.
- Load Swatches: Import swatches from other documents or libraries.
- Export Swatches: Save your custom swatches for future use.
Use Extract and Pattern Maker (Optional Plug-ins) 🔍
Optional plug-ins like Extract and Pattern Maker offer specialized tools.
- Open Extract: Filter > Extract
- Use Edge Highlighter Tool: Define areas to keep or remove.
- Use Fill Tool: Designate locations for removal.
- Pattern Maker: Filter > Pattern Maker
- Generate Patterns: Create seamless patterns from your image.
Conclusion 🎉
Mastering these Photoshop shortcuts, hotkeys, and Adobe Photoshop shortcut keys can dramatically enhance your workflow, saving you time and allowing for more creative expression. Whether you’re a beginner or a seasoned pro, integrating these shortcuts into your routine will make your editing process smoother and more efficient. Don’t forget to place images as described and use the provided alt text for accessibility and SEO benefits.

FAQ 🤔
Q: What are the most essential Photoshop shortcuts for beginners?
A: Most Important Keyboards Shortcuts: Before using any computer application every user should be aware of following basic shortcuts like Ctrl + C(c-copy), Ctrl + V(V- paste),Ctrl Z( z-for undo ),Ctr S for saving work.
Q: How can I customize Photoshop shortcuts?
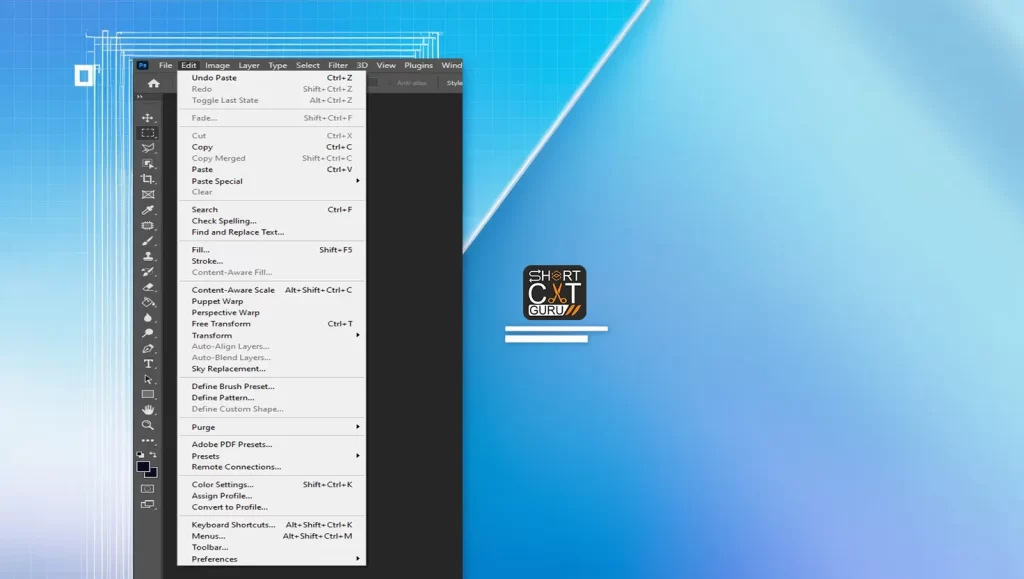
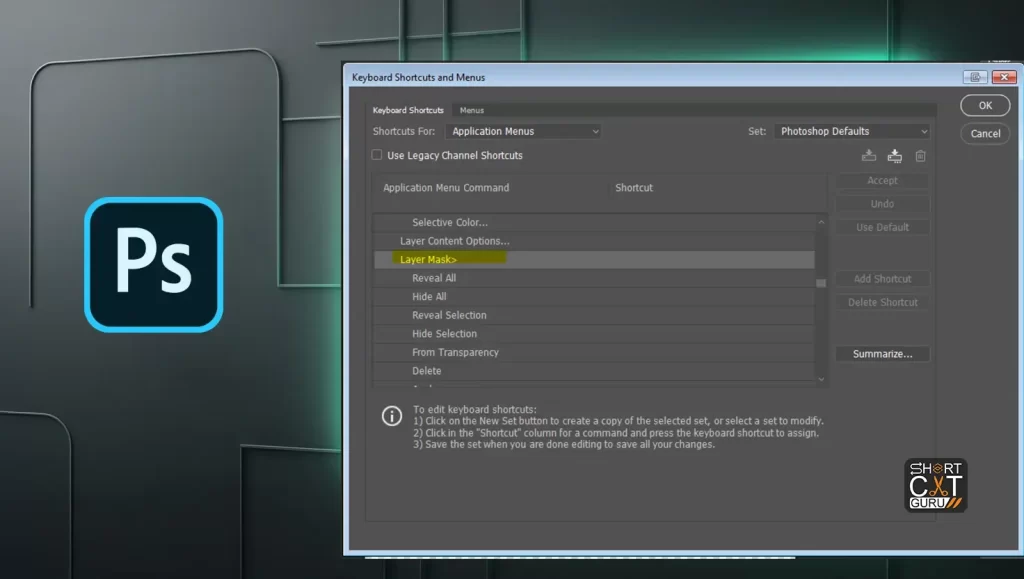
A: Go to Edit > Keyboard Shortcuts and configure the preferences according to your workflow.
Q: Keyboard Shortcuts for Photoshop Tools?
A: Yes, each tool has its shortcut. For example, the Brush Tool is accessed with B, the Lasso Tool with L, and the Crop Tool with C.
Q: Can I use Photoshop shortcuts on a tablet?
A: Some tablets like a keyboard or could have on-screen shortcuts so you can use some of the functions too
Q: What are the benefits of using Photoshop shortcuts?
A: Shortcuts save time, reduce repetitive strain, streamline workflow, and enhance creative efficiency.








Thank you for your sharing. I am worried that I lack creative ideas. It is your article that makes me full of hope. Thank you. But, I have a question, can you help me? https://www.binance.com/en-IN/register?ref=UM6SMJM3
Your article helped me a lot, is there any more related content? Thanks!
Can you be more specific about the content of your article? After reading it, I still have some doubts. Hope you can help me.