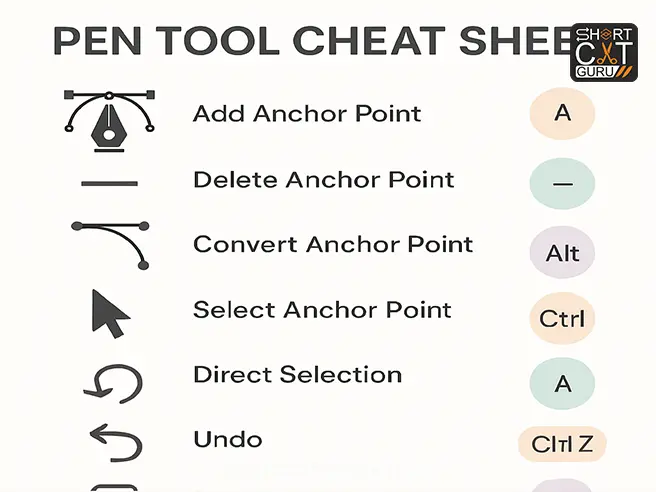
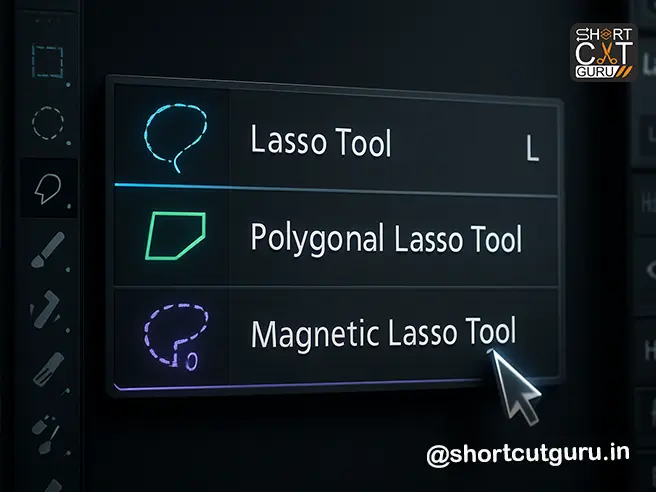
When it comes to precision in Photoshop Pen Tool is your ultimate weapon. At first glance, it may seem intimidating, but once you get the hang of it, you’ll realize it’s one of the most powerful tools for creating sharp selections, smooth curves, and clean paths. Whether you’re designing logos, working on vector shapes, or editing photos, the Pen Tool makes all the difference.
In this guide, we’ll break down everything about the Photoshop Pen Tool—from basics to advanced tricks—so you can confidently use it in your projects.
Table of Contents
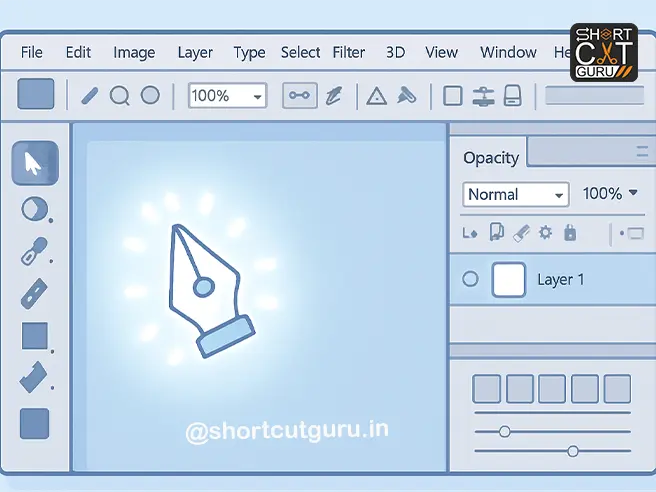
🖊️ Step 1: Choosing and Understanding the Pen Tool in Photoshop
Before you start drawing, you need to know where to find the Pen Tool in Photoshop and what it does.
Where is the Pen Tool?
- Open Adobe Photoshop.
- Look at the Tools Panel on the left.
- Click and hold the Pen Tool icon (it looks like a fountain pen nib).
- You’ll see several options:
- Pen Tool (for paths and shapes)
- Freeform Pen Tool
- Add Anchor Point Tool
- Delete Anchor Point Tool
- Convert Point Tool
For this Photoshop Pen Tool guide, we’ll focus on the standard Pen Tool.
What Does the Photoshop Pen Tool Do?
The Pen Tool allows you to create vector paths in Photoshop — smooth, scalable lines made of anchor points and direction handles. These paths can be:
- Converted into selections
- Turned into vector masks
- Used to cut out objects with precision (ideal for remove background with Pen Tool tasks)
- Saved and reused later
Unlike brush or lasso tools, paths created with the Pen Tool are non-destructive and fully editable — meaning you can tweak every curve and point after creation.
🧭 Step 2: Creating Your First Path — Click, Drag, and Curve Like a Pro
Let’s start simple. We’ll create an open path, then close it to form a shape — a core skill in any Pen Tool Photoshop tutorial.
Basic Click vs. Click-and-Drag
- Click only → Creates a straight line segment (corner point).
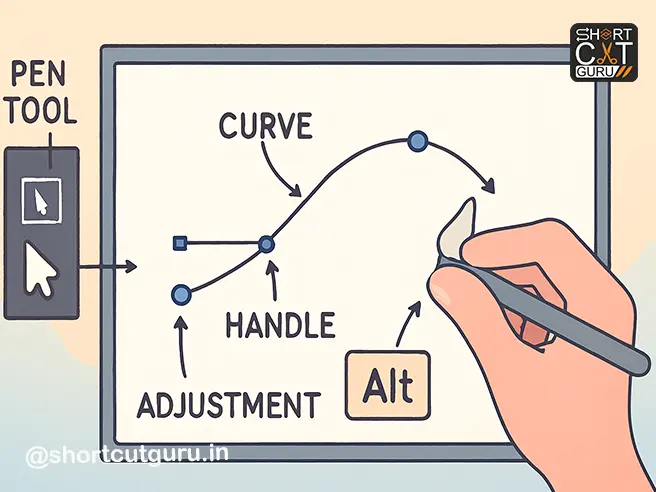
- Click and drag → Creates a curved segment (Bezier curve) with direction handles.
👉 Pro Tip: Always zoom in (Ctrl + +) when working with fine details. Precision matters in Photoshop clipping paths!
Let’s Create a Curve
- Select the Pen Tool.
- Click on your canvas and drag slightly — you’ll see two handles appear.
- These handles control the direction and curvature of your path.
- Move your cursor to the next point, click and drag again to continue the curve.
“Hold the Alt key, click on a handle, and move it.”
This is a game-changing trick in Adobe Photoshop Pen Tool guide workflows. Holding Alt (Option on Mac) lets you adjust one handle independently — giving you total control over asymmetrical curves. This is essential for tracing organic shapes like hair, fabric, or product edges.
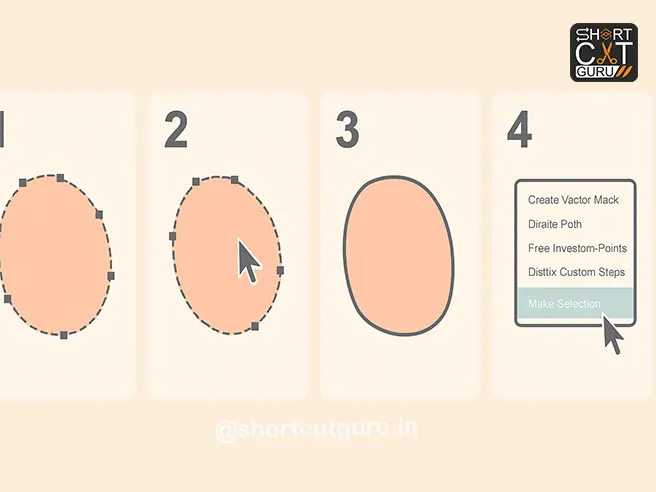
🔄 Step 3: Fixing Mistakes — You’re Always in Control with the Photoshop Pen Tool
Made a mistake while using the Pen Tool? No problem.
Photoshop’s Pen Tool for beginners is forgiving. You can:
- Undo with Ctrl+Z (Cmd+Z on Mac)
- Move anchor points with the Direct Selection Tool (white arrow)
- Adjust handles by dragging them
- Delete points with the Delete Anchor Point Tool
👉 Pro Tip: Double-click the Zoom Tool to fit your image to screen. Easier navigation = fewer mistakes in your vector paths Photoshop projects.
Don’t rush. Take your time. Even pros go point-by-point when precision is required.
🔁 Step 4: Closing the Path and Converting to Selection — Core Photoshop Pen Tool Skill
Once your path in Photoshop outlines your subject perfectly, it’s time to close it and turn it into something usable — like a selection or mask. This is a foundational Pen Tool selection technique.
How to Close the Path
- Hover your Pen Tool over the first anchor point you created.
- You’ll see a small circle icon next to the Pen cursor — this means “close path.”
- Click to close the loop.
“Right-click and choose ‘Make Selection’.”
Converting Path to Selection
- Right-click anywhere on the path.
- Choose “Make Selection…”
- Set Feather Radius to 0 (unless you want soft edges).
- Click OK.
Boom! You now have a perfect selection — ready for masking or editing.🎭 Step 5: Turning Your Selection into a Layer Mask — Advanced Pen Tool Mask Tutorial
Selections are temporary. To make your cutout permanent and editable, convert it into a Layer Mask — a key step in any Pen Tool mask tutorial.
How to Add a Mask
- With your selection active, go to the Layers Panel.
- Click the “Add Layer Mask” button at the bottom (rectangle with circle).
- Your background disappears — revealing transparency or the layer below.
✅ You’ve just created a non-destructive, editable cutout using the Pen Tool!
👉 Pro Tip: Paint on the mask with black to hide, white to reveal. Gray for partial transparency.

💾 Step 6: Saving and Managing Paths Like a Pro — Work Path Photoshop Mastery
Paths are powerful — but only if you save them. This is where work path Photoshop management becomes essential.
Saving Your Path
- Go to the Paths Panel (Window > Paths if not visible).
- You’ll see “Work Path” — this is temporary.
- Double-click “Work Path”.
- Give it a name like “Product Cutout” or “Portrait Path”.
- Click OK.
Now your path is saved permanently in the document — a must for Photoshop clipping paths used in e-commerce or print.
Showing/Hiding Paths
- Click the eye icon next to the path name to toggle visibility.
- Click the path thumbnail to reactivate it for editing.
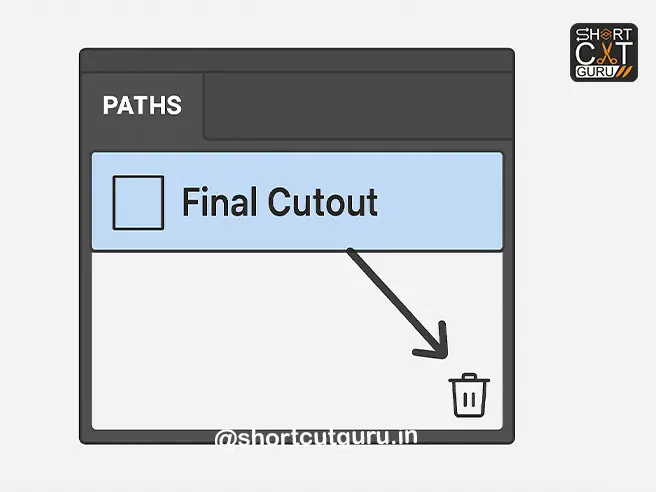
Deleting a Path
Don’t need it anymore?
- Drag the path name to the Trash icon at the bottom of the Paths Panel.
- Or right-click > Delete Path.
⚖️ Step 7: Photoshop Pen Tool vs. AI Selection Tools — Why Precision Wins (Especially for Remove Background with Pen Tool)
“You might want to use ‘Select Subject’ to remove the background… AI didn’t do a good job here. That’s why we need the Pen Tool.”
Adobe’s AI-powered Select Subject and Object Selection Tool are great for quick, simple images — like a person against a plain wall or a product on white.
But when you’re dealing with:
- Flyaway hair
- Transparent objects (glass, fur, lace)
- Complex backgrounds
- Fine jewelry or product details
…AI fails. It creates jagged edges, misses strands, or includes unwanted background pixels.
That’s where the Pen Tool shines — especially for remove background with Pen Tool tasks.
With manual control, you decide exactly where the edge lies. No guesswork. No cleanup. Just perfection.
🧩 Step 8: Advanced Tips to Master the Photoshop Pen Tool Faster — Vector Paths Photoshop Pro Secrets
Ready to level up? Here are pro techniques to speed up your workflow and improve accuracy in vector paths Photoshop creation.
1. Use Keyboard Shortcuts
- Ctrl (Cmd) → Temporarily switch to Direct Selection Tool to move points
- Alt (Option) → Adjust one handle independently
- Ctrl + H → Hide/show path (great for checking your selection against the image)
- Ctrl + Enter → Convert path to selection (faster than right-clicking!)
2. Zoom and Navigate Efficiently
- Spacebar → Pan around canvas while drawing
- Ctrl + + / – → Zoom in/out
- Ctrl + 0 → Fit image to screen
3. Place Anchor Points Strategically
- Fewer points = smoother curves
- Place points at peaks and valleys of curves
- Avoid placing points on flat areas — let the handles do the work
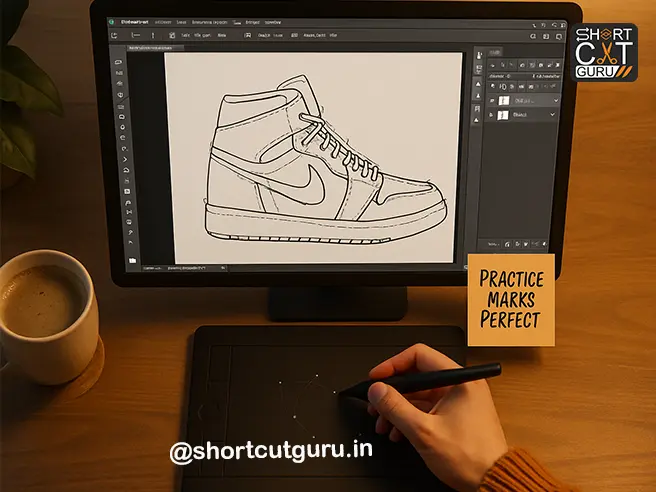
4. Practice on Simple Shapes First
Start with:
- Coffee cups
- Bottles
- Shoes
- Leaves
Then move to complex subjects like:
- Portraits with hair
- Animals with fur
- Jewelry with reflections — perfect for Photoshop clipping paths
🧪 Step 9: Real-World Practice Projects — Apply Your Photoshop Pen Tool Tutorial Skills
The best way to master the Pen Tool? Use it in real projects.
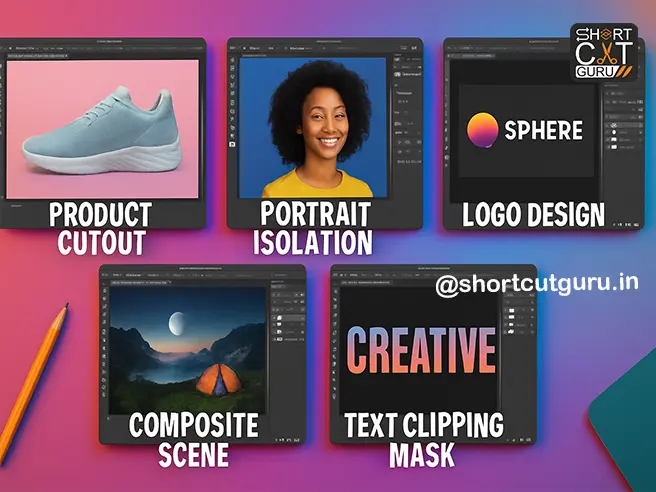
Here are 5 beginner-friendly ideas perfect for your how to use Pen Tool for beginners journey:
1. Product Cutouts for E-Commerce
Remove backgrounds from product photos for Amazon, Shopify, or Etsy listings — classic Photoshop clipping paths work.
2. Portrait Isolation for Social Media
Cut out people cleanly for Instagram posts, ads, or banners — ideal Pen Tool selection technique.
3. Logo Design & Vector Shapes
Use the Pen Tool to create custom icons, badges, or text effects — core vector paths Photoshop skill.
4. Composite Images
Place your cutout subject into a new background — think fantasy scenes or marketing visuals.
5. Clipping Masks for Text Effects
Create text filled with images using Pen Tool paths and clipping masks.
❌ Common Beginner Mistakes (And How to Avoid Them) — Pen Tool in Photoshop Guide Essentials
Even the best designers started somewhere. Avoid these pitfalls in your Adobe Photoshop Pen Tool guide journey:
Mistake 1: Too Many Anchor Points
→ Leads to jagged, unnatural curves.
✅ Fix: Use fewer points. Let handles create the curve.
Mistake 2: Not Zooming In
→ Miss fine details like hair or fabric threads.
✅ Fix: Zoom to 100–200% for precision work.
Mistake 3: Forgetting to Close the Path
→ Selection won’t work properly.
✅ Fix: Always hover over the first point to close the loop.
Mistake 4: Ignoring the Alt Key
→ Can’t adjust curves asymmetrically.
✅ Fix: Hold Alt to break handle symmetry — essential for realism in create paths in Photoshop.
Mistake 5: Not Saving Paths
→ Lose hours of work if Photoshop crashes.
✅ Fix: Double-click “Work Path” and name it immediately.
📈 Why the Photoshop Pen Tool is a Career-Changing Skill — Especially for Clipping Paths
Mastering the Pen Tool isn’t just about editing photos — it’s about unlocking professional opportunities, especially in Photoshop clipping paths for e-commerce and print.
Here’s where this skill pays off:
- Freelance Photo Editing ($20–$100/hr on Upwork/Fiverr)
- E-Commerce Product Editing (high demand for clean cutouts — aka remove background with Pen Tool)
- Graphic Design Agencies (logos, packaging, branding using vector paths Photoshop)
- Marketing & Advertising (composite ads, social media visuals)
- UI/UX Design (custom icons, illustrations)
Companies pay top dollar for precision. AI can’t replace human judgment — yet.
🧠 Pro Workflow: Photoshop Pen Tool in 60 Seconds (Recap) — Ultimate Pen Tool in Photoshop Summary
Let’s summarize the ideal workflow in this Photoshop Pen Tool tutorial:
- Select Pen Tool → Paths mode.
- Click and drag to create curves — use Alt to adjust handles.
- Close the path by clicking the first point.
- Right-click → Make Selection → Feather 0.
- Add Layer Mask to isolate your subject.
- Save Path by double-clicking “Work Path.”
- Hide/Show with Paths Panel or Ctrl+H.
- Delete Path by dragging to trash when done.
Practice this loop until it’s muscle memory.
🏁 Final Thoughts: Your Journey to Photoshop Pen Tool Mastery Starts Now — Own Your Adobe Photoshop Pen Tool Guide
The Pen Tool may seem intimidating at first — but like riding a bike or learning to drive, it becomes second nature with practice.
Don’t aim for perfection on your first try. Aim for progress.
Every anchor point you place, every curve you adjust, every mask you create — it’s building your skill, your portfolio, and your confidence in how to use Photoshop Pen Tool for beginners.
“That’s it. Now go practice — and don’t forget to write your comments below!”
We’d love to hear from you:
- What was your biggest “aha!” moment in this Pen Tool in Photoshop guide?
- Which project are you excited to try first?
- Got stuck? Ask us in the comments — we’ll help!
📌 Quick Reference Cheat Sheet — Photoshop Pen Tool Selection Technique & More
| Select Pen Tool | P |
| Adjust one handle | Hold Alt while dragging |
| Close path | Hover over first point → click |
| Convert to selection | Right-click → Make Selection OR Ctrl+Enter |
| Add Layer Mask | Click mask icon in Layers Panel |
| Hide/Show path | Ctrl+H |
| Save path | Double-click “Work Path” → Name it |
| Delete path | Drag to trash in Paths Panel |
| Move canvas while drawing | Hold Spacebar |
💬 Join the Community — Share Your Photoshop Pen Tool Mask Tutorial Results
Mastering the Photoshop Pen Tool is more fun with others. Share your progress:
- Tag us on Instagram with #PenToolPro
- Post before/after edits in our Facebook Group
- Ask questions in the comments below — we reply to everyone!
🚀 Ready to Level Up? Here’s What to Learn Next After This Photoshop Pen Tool Guide
Once you’ve mastered the Photoshop Pen Tool, explore:
- Clipping Masks & Layer Masks (advanced compositing)
- Vector Shapes & Custom Icons — next level vector paths Photoshop
- Pen Tool + Brush Tool combos (digital illustration)
- Paths for Animations (After Effects integration)
The Pen Tool is just the beginning. Your creative journey is limitless.
What is the Photoshop Pen Tool?
In Photoshop Pen Tool lets you create accurate shapes and paths with full control. Unlike the Brush or Pencil tool, which paints pixels directly, the Pen Tool creates vector-based paths that can be adjusted infinitely without losing quality.
Think of it as a pencil with infinite erasers—you can refine your lines anytime without starting over.
Why Should You Use the Photoshop Pen Tool?
You may wonder, “Why not just use the lasso or magic wand?” Here’s why the Pen Tool stands out:
- Accuracy – Perfect for sharp selections and curves.
- Flexibility – Edit anchor points anytime.
- Scalability – Paths remain crisp when resized.
- Expert Outcomes – Vital for emblem creation, photo editing, and intricate selections.
Think of Photoshop as your studio and the Pen Tool as a precision blade—it delivers the sharpest, most accurate cuts.
Getting Started with the Photoshop Pen Tool
To activate the Photoshop Pen Tool:
- Press P on your keyboard.
- Alternatively, pick this option through the Instruments section positioned to the left.
Once active, you’ll see your cursor change to a pen icon, ready to plot points on your canvas.
Understanding Anchor Points and Paths
The Pen Tool works by connecting anchor points with lines called paths.
- Anchor Point: A dot you place with the Pen Tool.
- Path: The line connecting anchor points.
- Handles: Controls that adjust the curve of a path.
Think of it like connect-the-dots, but with full control over every bend and angle.
Types of Photoshop Pen Tool
1. Standard Photoshop Pen Tool
The default tool for creating straight lines and smooth curves.
2. Freeform Photoshop Pen Tool
Draws paths more like the Brush Tool—freehand style. Photoshop automatically adds anchor points as you move.
3. Curvature Photoshop Pen Tool
Perfect for beginners. It automatically smooths curves, requiring fewer anchor points.
Creating Straight Paths with the Photoshop Pen Tool
To draw a straight path:
- Click once to create the first anchor point.
- Click again at another spot to create a straight line.
- Continue clicking for more connected straight lines.
- Close the path by clicking back on the first point.
Pro tip: Press and hold the Shift key to lock your lines to exact horizontal, vertical, or 45-degree angles.
Drawing Curves with Control Handles
Curves are the magic of the Photoshop Pen Tool:
- Click and drag to create an anchor point with handles.
- Move your cursor and click again, dragging for another curve.
- Modify controls to enhance the arc’s orientation and extent.
It’s like steering a car—the handles are your steering wheel.
Editing Paths and Anchor Points
Made a mistake? No problem.
- Use the Direct Selection Tool (A) to adjust anchor points.
- Drag handles to reshape curves.
- Right-click for options like “Convert Point” to switch between straight and curved anchors.
Converting Paths into Selections
One key benefit of this drawing instrument involves generating accurate outlines:
- Right-click a closed path → Make Selection.
- Feather edges for smoother blending.
This technique is perfect for cutting objects from backgrounds with pixel-perfect accuracy.
Using Shape Layers with the Photoshop Pen Tool
Instead of just paths, the Photoshop Pen Tool can also create vector shapes:
- Choose Shape in the top options bar.
- Pick a color fill or stroke.
- Draw logos, banners, and custom design elements.
These shapes remain editable and scalable.
Adding and Deleting Anchor Points
- Add Anchor Point Tool (+) lets you refine curves with more points.
- Delete Anchor Point Tool (-) simplifies paths by removing unnecessary points.
Pro tip: Simplify your paths—adding excessive anchor points only makes adjustments more difficult.
Combining Photoshop Pen Tool with Masks
For non-destructive editing:
- Draw a path around your subject.
- Convert the path to a selection.
- Apply it as a Layer Mask.
This way, you hide parts of an image without deleting them—like using Photoshop’s “eraser with undo.”
Advanced Tips for Precision Work
- Zoom in to 300%+ for detailed path placement.
- Use fewer anchor points for smoother curves.
- Toggle between straight and bent points for tidier arrangements.
- Store pathways inside the Pathways section to avoid losing advancements.
Common Mistakes and How to Avoid Them
- Too many anchor points → Keep it minimal.
- Not closing paths → Always finish your shapes.
- Don’t overlook saving your paths—regularly store them in the Paths panel to avoid losing work.
- Relying only on auto tools → Manual Pen Tool control gives the best results.
Practice Exercises to Master the Photoshop Pen Tool
- Trace simple shapes like circles, rectangles, or logos.
- Outline an object in a photo with precision.
- Create a custom logo using only the Pen Tool.
- Practice making paths, then converting them into selections.
The more you practice, the more natural it feels—like learning handwriting all over again.
Conclusion
The Photoshop Pen Tool is more than just a path creator—it’s your gateway to precision editing and professional-quality designs. At first, it may feel tricky, but with patience and practice, it becomes second nature. Whether you’re cutting out objects, designing vector shapes, or creating masks, the Pen Tool gives you ultimate control.
So, next time you feel overwhelmed, remember: every professional once struggled with the Pen Tool. With consistent practice, you’ll soon master it and wonder how you ever worked without it.
FAQs
1. Is the Photoshop Pen Tool only for professionals?
No, beginners can (and should) learn it. It may feel complex at first, but practice makes it simple.
2. What’s the difference between the Photoshop Pen Tool and the Lasso Tool?
The Lasso is quick but less precise, while the Pen Tool gives you full control and cleaner results.
3. Can I use the Photoshop Pen Tool for logos?
Yes! It’s ideal for designing sharp, scalable vector logos in Photoshop.
4. How do I make the Photoshop Pen Tool less frustrating?
Start with the Curvature Pen Tool—it’s beginner-friendly and reduces the learning curve.
5. Can I export paths created with the Photoshop Pen Tool?
Absolutely. You can export them to Illustrator or save them for reuse within Photoshop.


